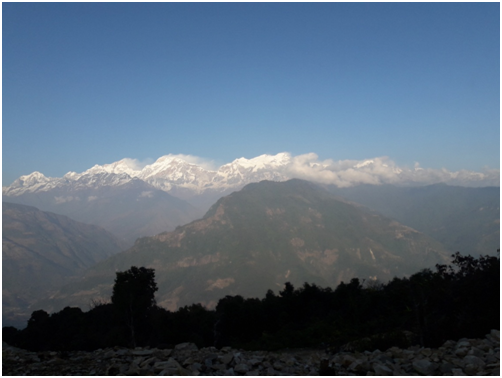
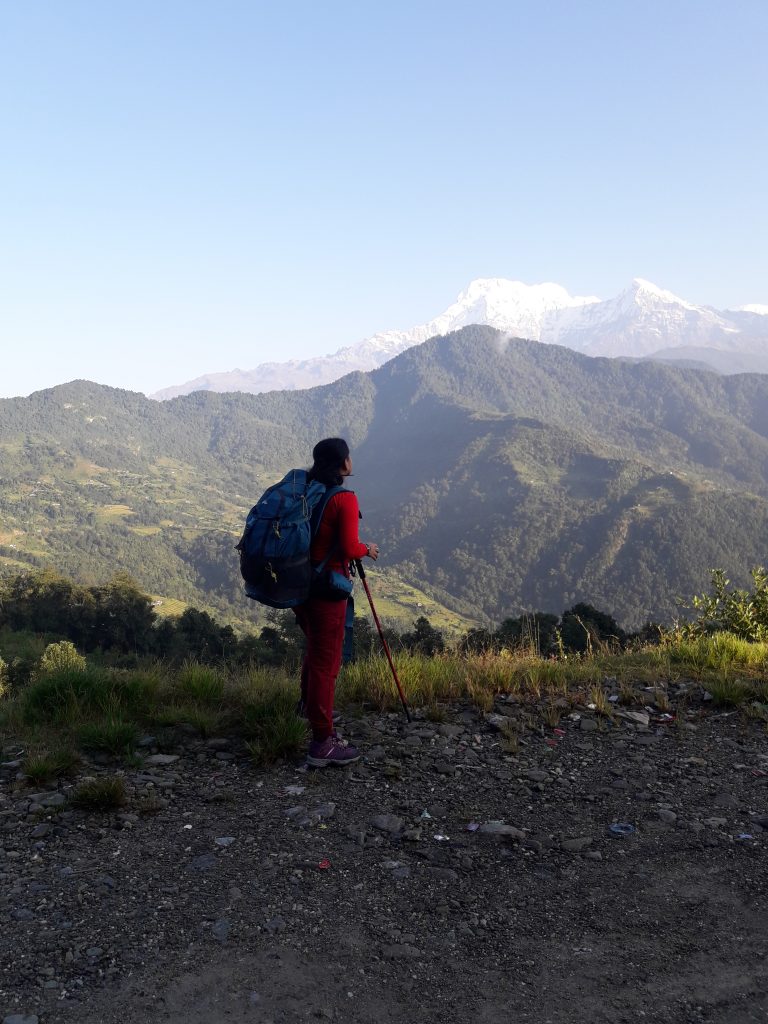
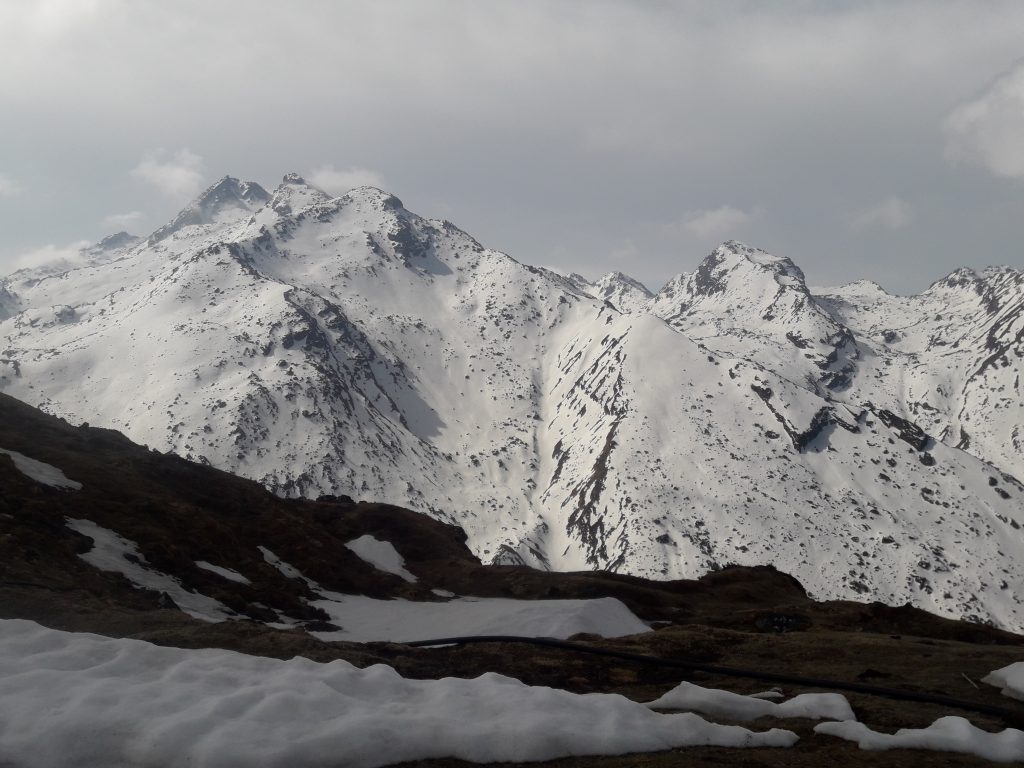
Aama Yangri is located in the Helambu area of Sidhupalchowk District, just 90 kilometers north of Kathmandu Valley. The peak’s name means mother in Nepali, and she is said to be the Hyolmo region’s dakini or guardian. The height of the summit is 3771 meters. It has recently gained a lot of attention due to the discovery of its floral route and breathtaking mountain vistas. Rhododendron, pine, and oak trees line the route. Hyolmo culture is also prevalent in the area. Sherpa, Chhetri, Tamang, and other ethnic groups live happily together. The summit is one of Langtang National Park’s jewels.
General Information
Altitude: 3,771 m
District: Sindhupalchowk
Duration: 2 days trip (from the Kathmandu Valley)
Trekking hours: 4-5 hours for one way from Tarkeghyang
Vehicle hours: 4 hours for one way from Kathmandu to Tarkeghyang
Vehicle supported: Bike, mountain bike, jeep, bus
Public vehicle available: jeep, local bus, bike (up to Tarkeghyang)
Difficulty level: 2/5
Specialty: panoramic views of Mount Everest, Langtang Ranges, Dorje Lakpa, Gauri Shankar, etc.
Permit: Foreigners, with the exception of SAARC nations, must get a Langtang National Park permit and pay an admission charge of NPR 3000, whilst SAARC countries must only pay NPR 1500. Nepalese citizens are charged NPR 100 to enter.
About Bus: Only one bus leaves to Tarkeghyang in two days. The starting point of the bus is Narayntar Shiva Chowk near Baudha. During monsoon, the bus reaches up to Timbu only. So, on monsoon, the trek begins from Timbu.
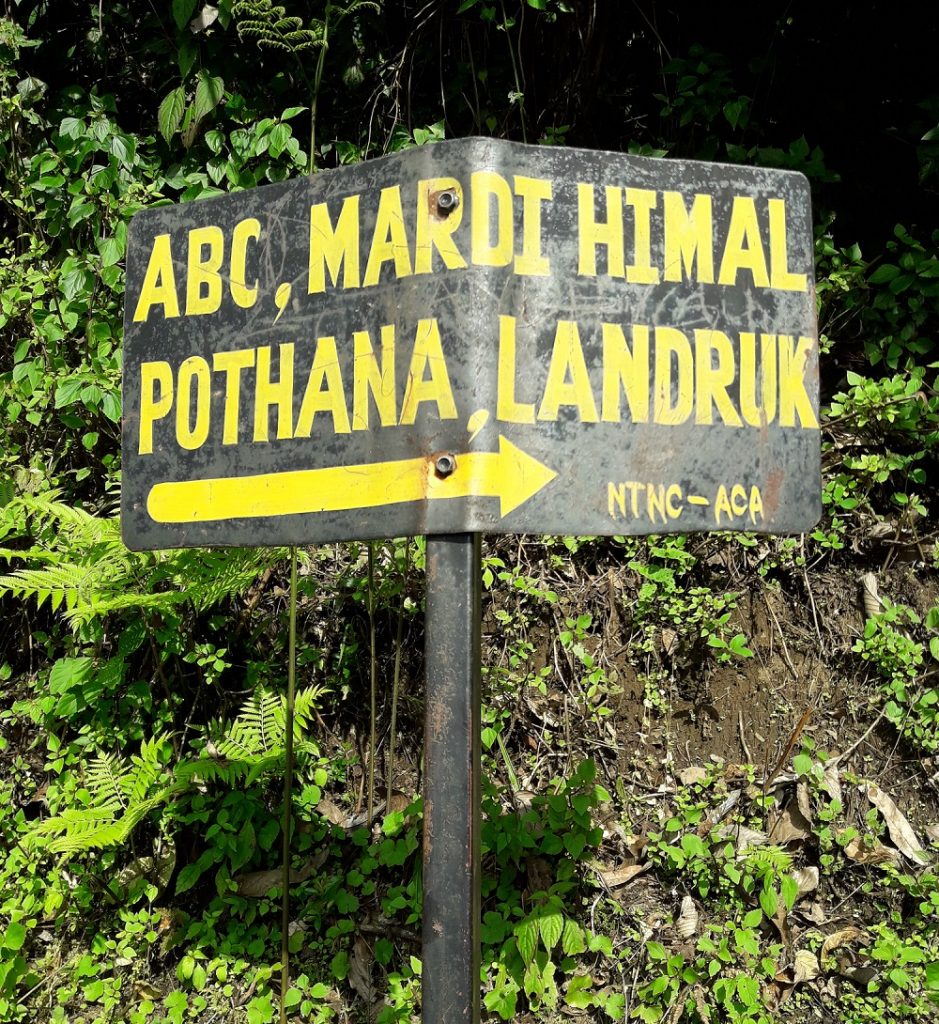
Trek Route: The bus route is from Narayantar to Tarkeghyang through Melamchi and Timbu. The trek route is from Tarkeghyang to Aama Yangri Peak.
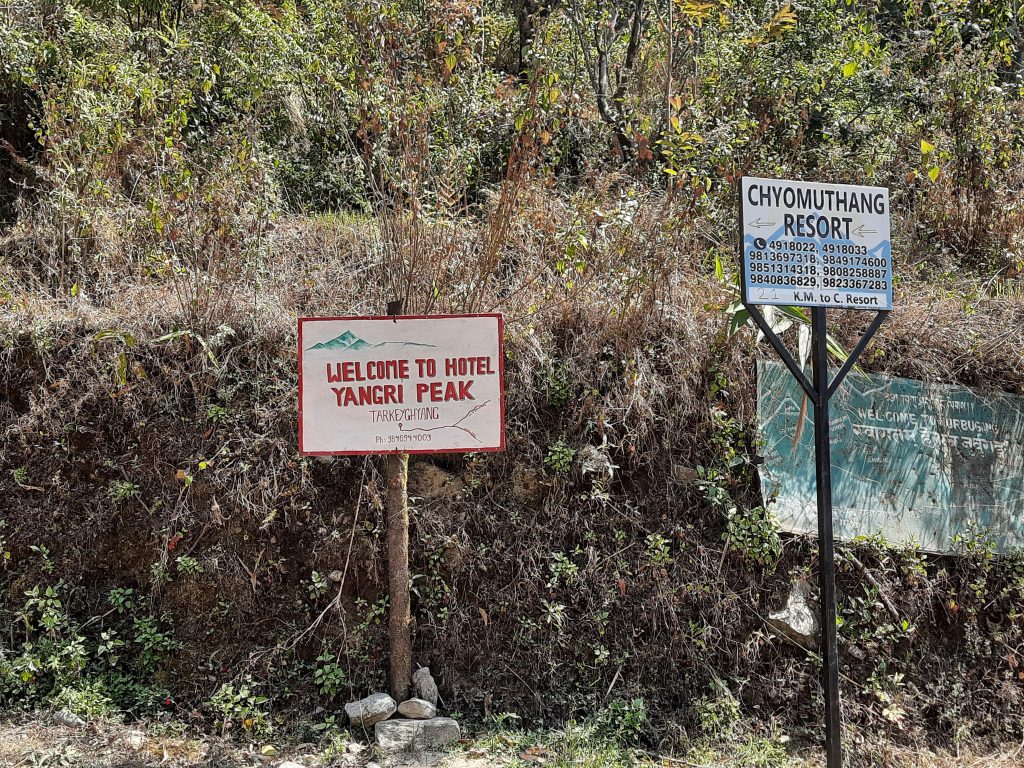
Hotel Information in Tarkeghyang: Hotel Yangri Peak, 9848944003
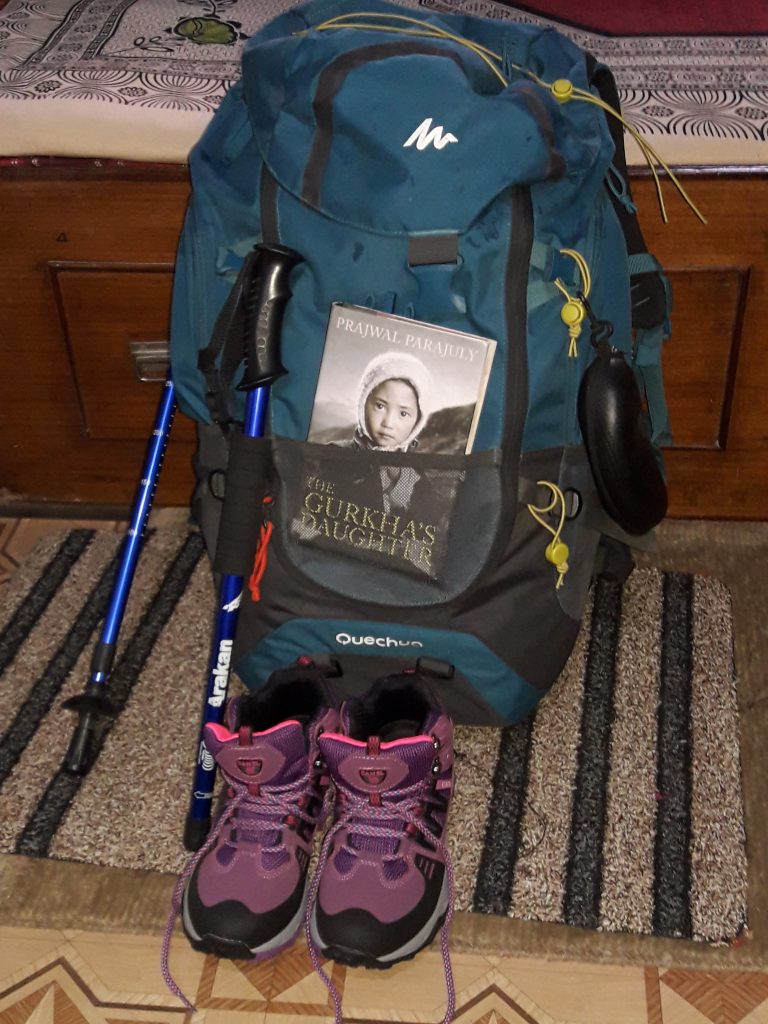
Things To Carry:
Raincoat
Trekking
poles
Extra
pair of clothes and socks
Flip-flops
Snacks
Medicines
Things To Wear:
Trekking
shoes
Light
and loose clothes (jeans not recommended)
Sun
hat
Sunscreen
Itinerary
Day 1: Take a bus from Narayantar
and reach Tarkeghyang on the first day.
Day 2: Trek to Aama Yangri Peak and
back to Tarkeghyang and to Kathmandu or extend the trip to day 3.
Specialty of the Trek!
You can finish this trek over a weekend! All you
need is two days from Kathmandu and the trek is over.
This is the easiest trek I ever had.
It is a safe trek for solo travelers too as you
can return back to the village within half day.
You get nice hospitality in Tarkeghyang. The
place has been badly affected by 2015 Earthquake but it is getting better.
It is a virgin trail.
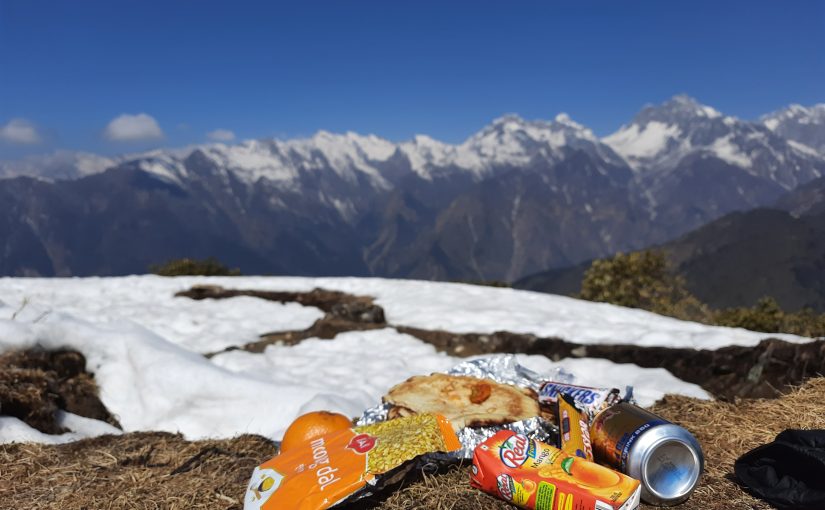
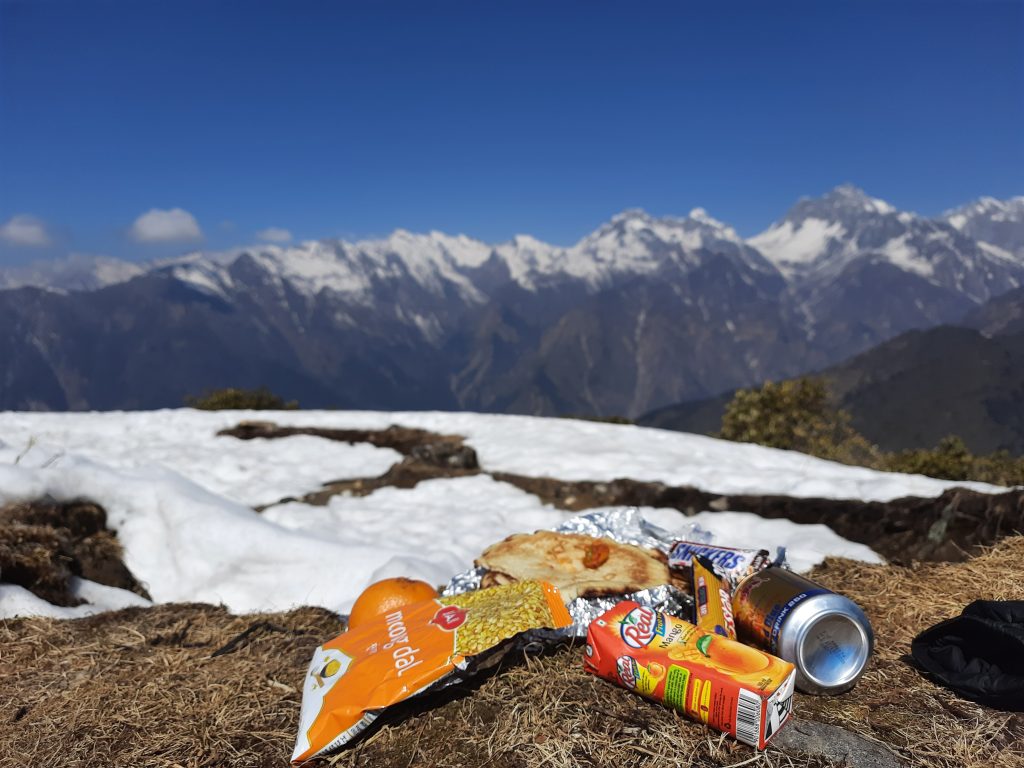
There is no chance you get to buy a coke or
snicker after you begin trekking from Tarkeghyang. So, carry whatever you might
crave during the trek. Well, carry your wrappers back with you!
Local Tongba, Tibetan breakfast, Nepali tato
khana, amazing Mountain View, nice weather, and amazing breeze!
My Trekking Experience
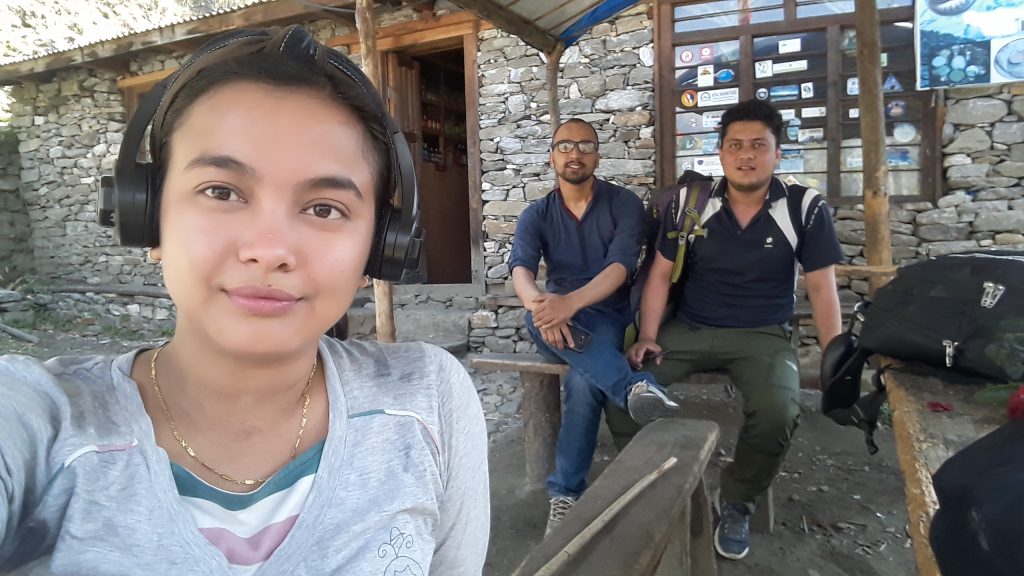
So, on March 12, 2022, I chose to
travel Aama Yangri. It was a last-minute idea when the trekking expedition to
Tilicho was postponed owing to severe snowfall blocking the path. So, I started
my journey with very little research. I couldn’t find a bus that would take me
directly to Tarkeghyang since it was an alternative day for the bus. As a
result, I took the bus up to Timbu. It was a nice walk from Timbu to
Tarkeghyang.
I left Kathmandu at 8:00 a.m., and
between 1:00 p.m. and 2:00 p.m., I had arrived at Tarkeghyang, the last
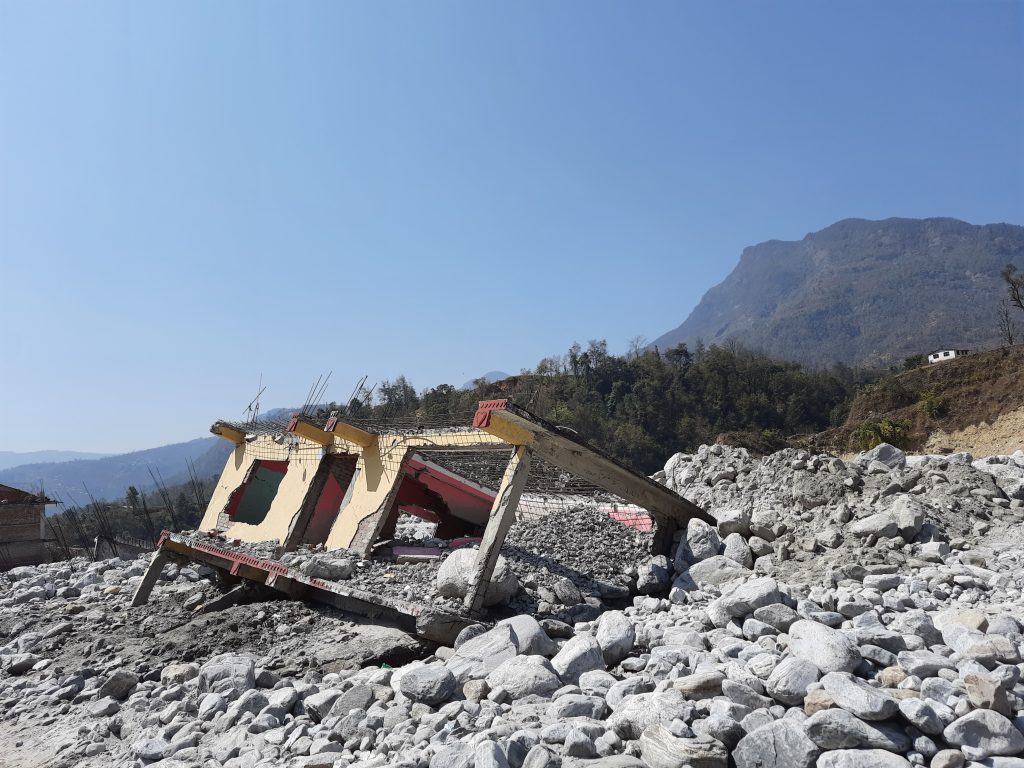
stop of the day. Melamchi’s path provided a terrifying perspective. The
remnants of structures that were devastated by a recent flood were found along
the Melamchi riverbank. Aside from that, the path offered spectacular views of the
mountains and greenery. It was mostly off-road.
Tarkeghyang was stunning. I stayed
at Hotel Yangri Peak, which provided excellent service. The nicest aspect about
this walk is that you arrive at the accommodation well before dark, allowing
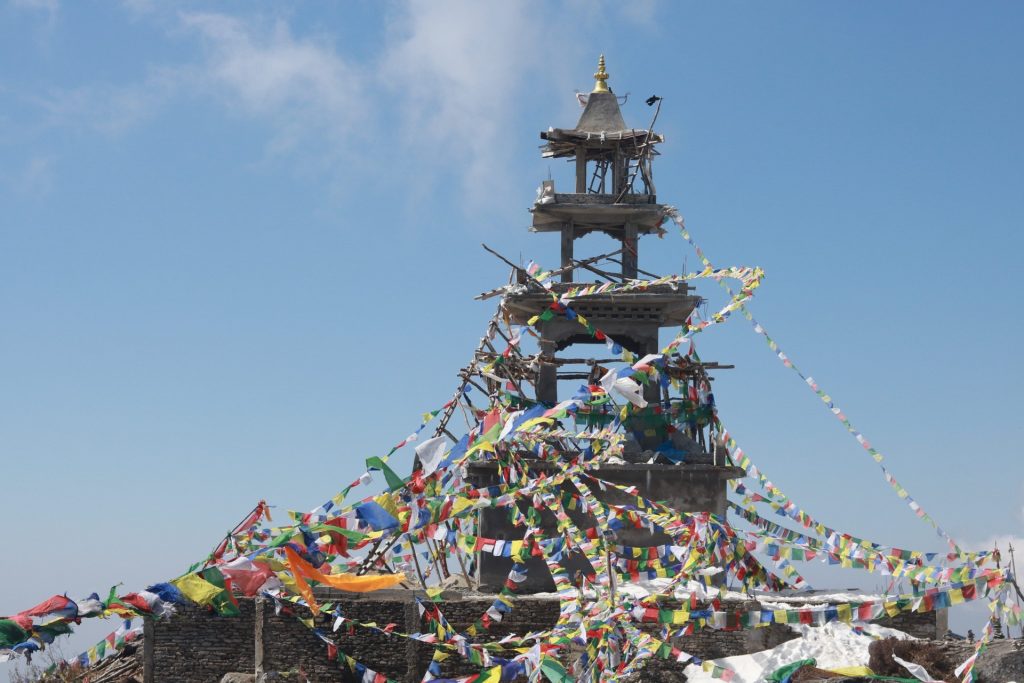
you to see the area on the same day. Near where I stayed, there was a gumba.
The colorful ribbons linked to the gumba let in a beautiful wind from beyond
the mountains.
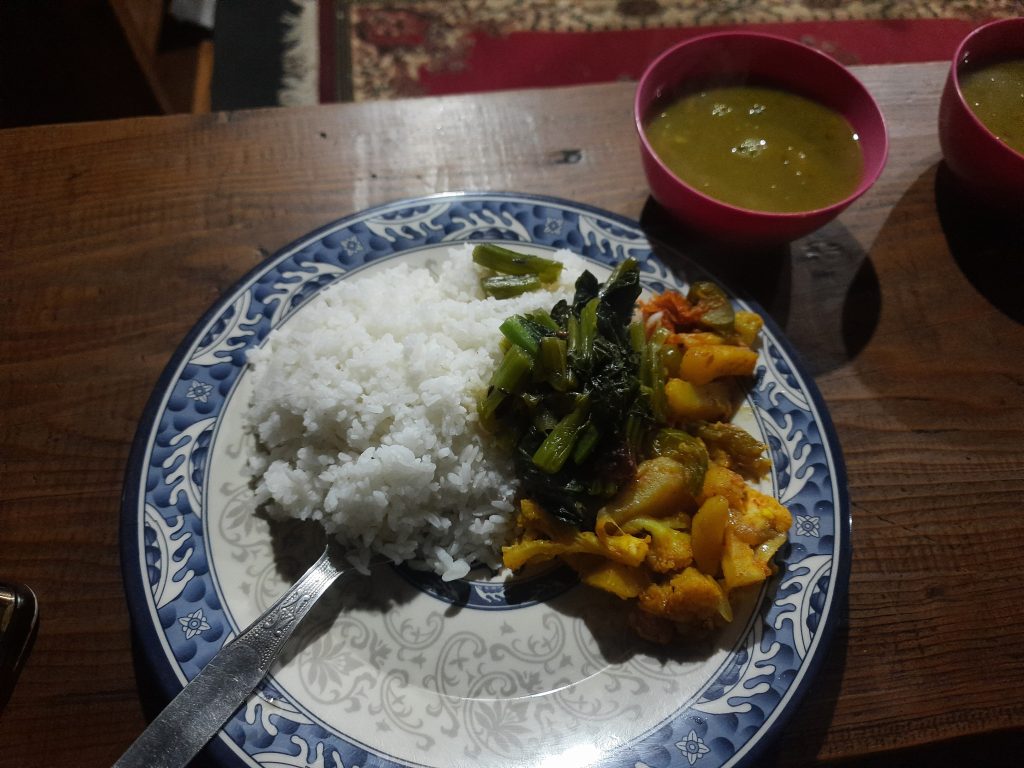
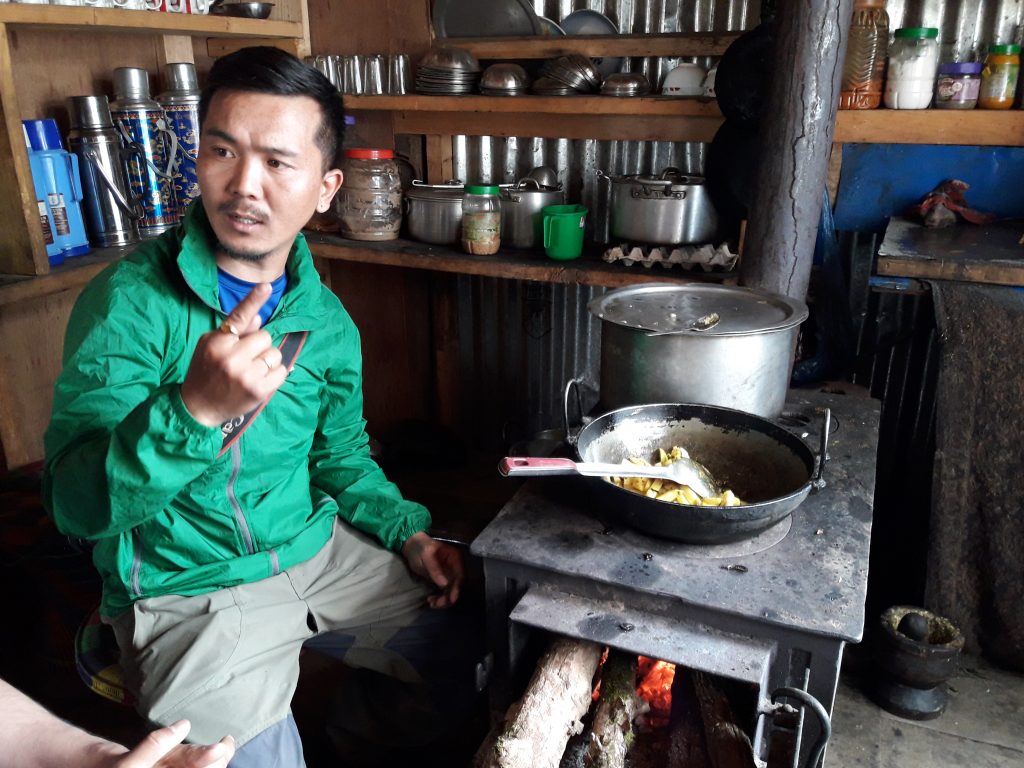
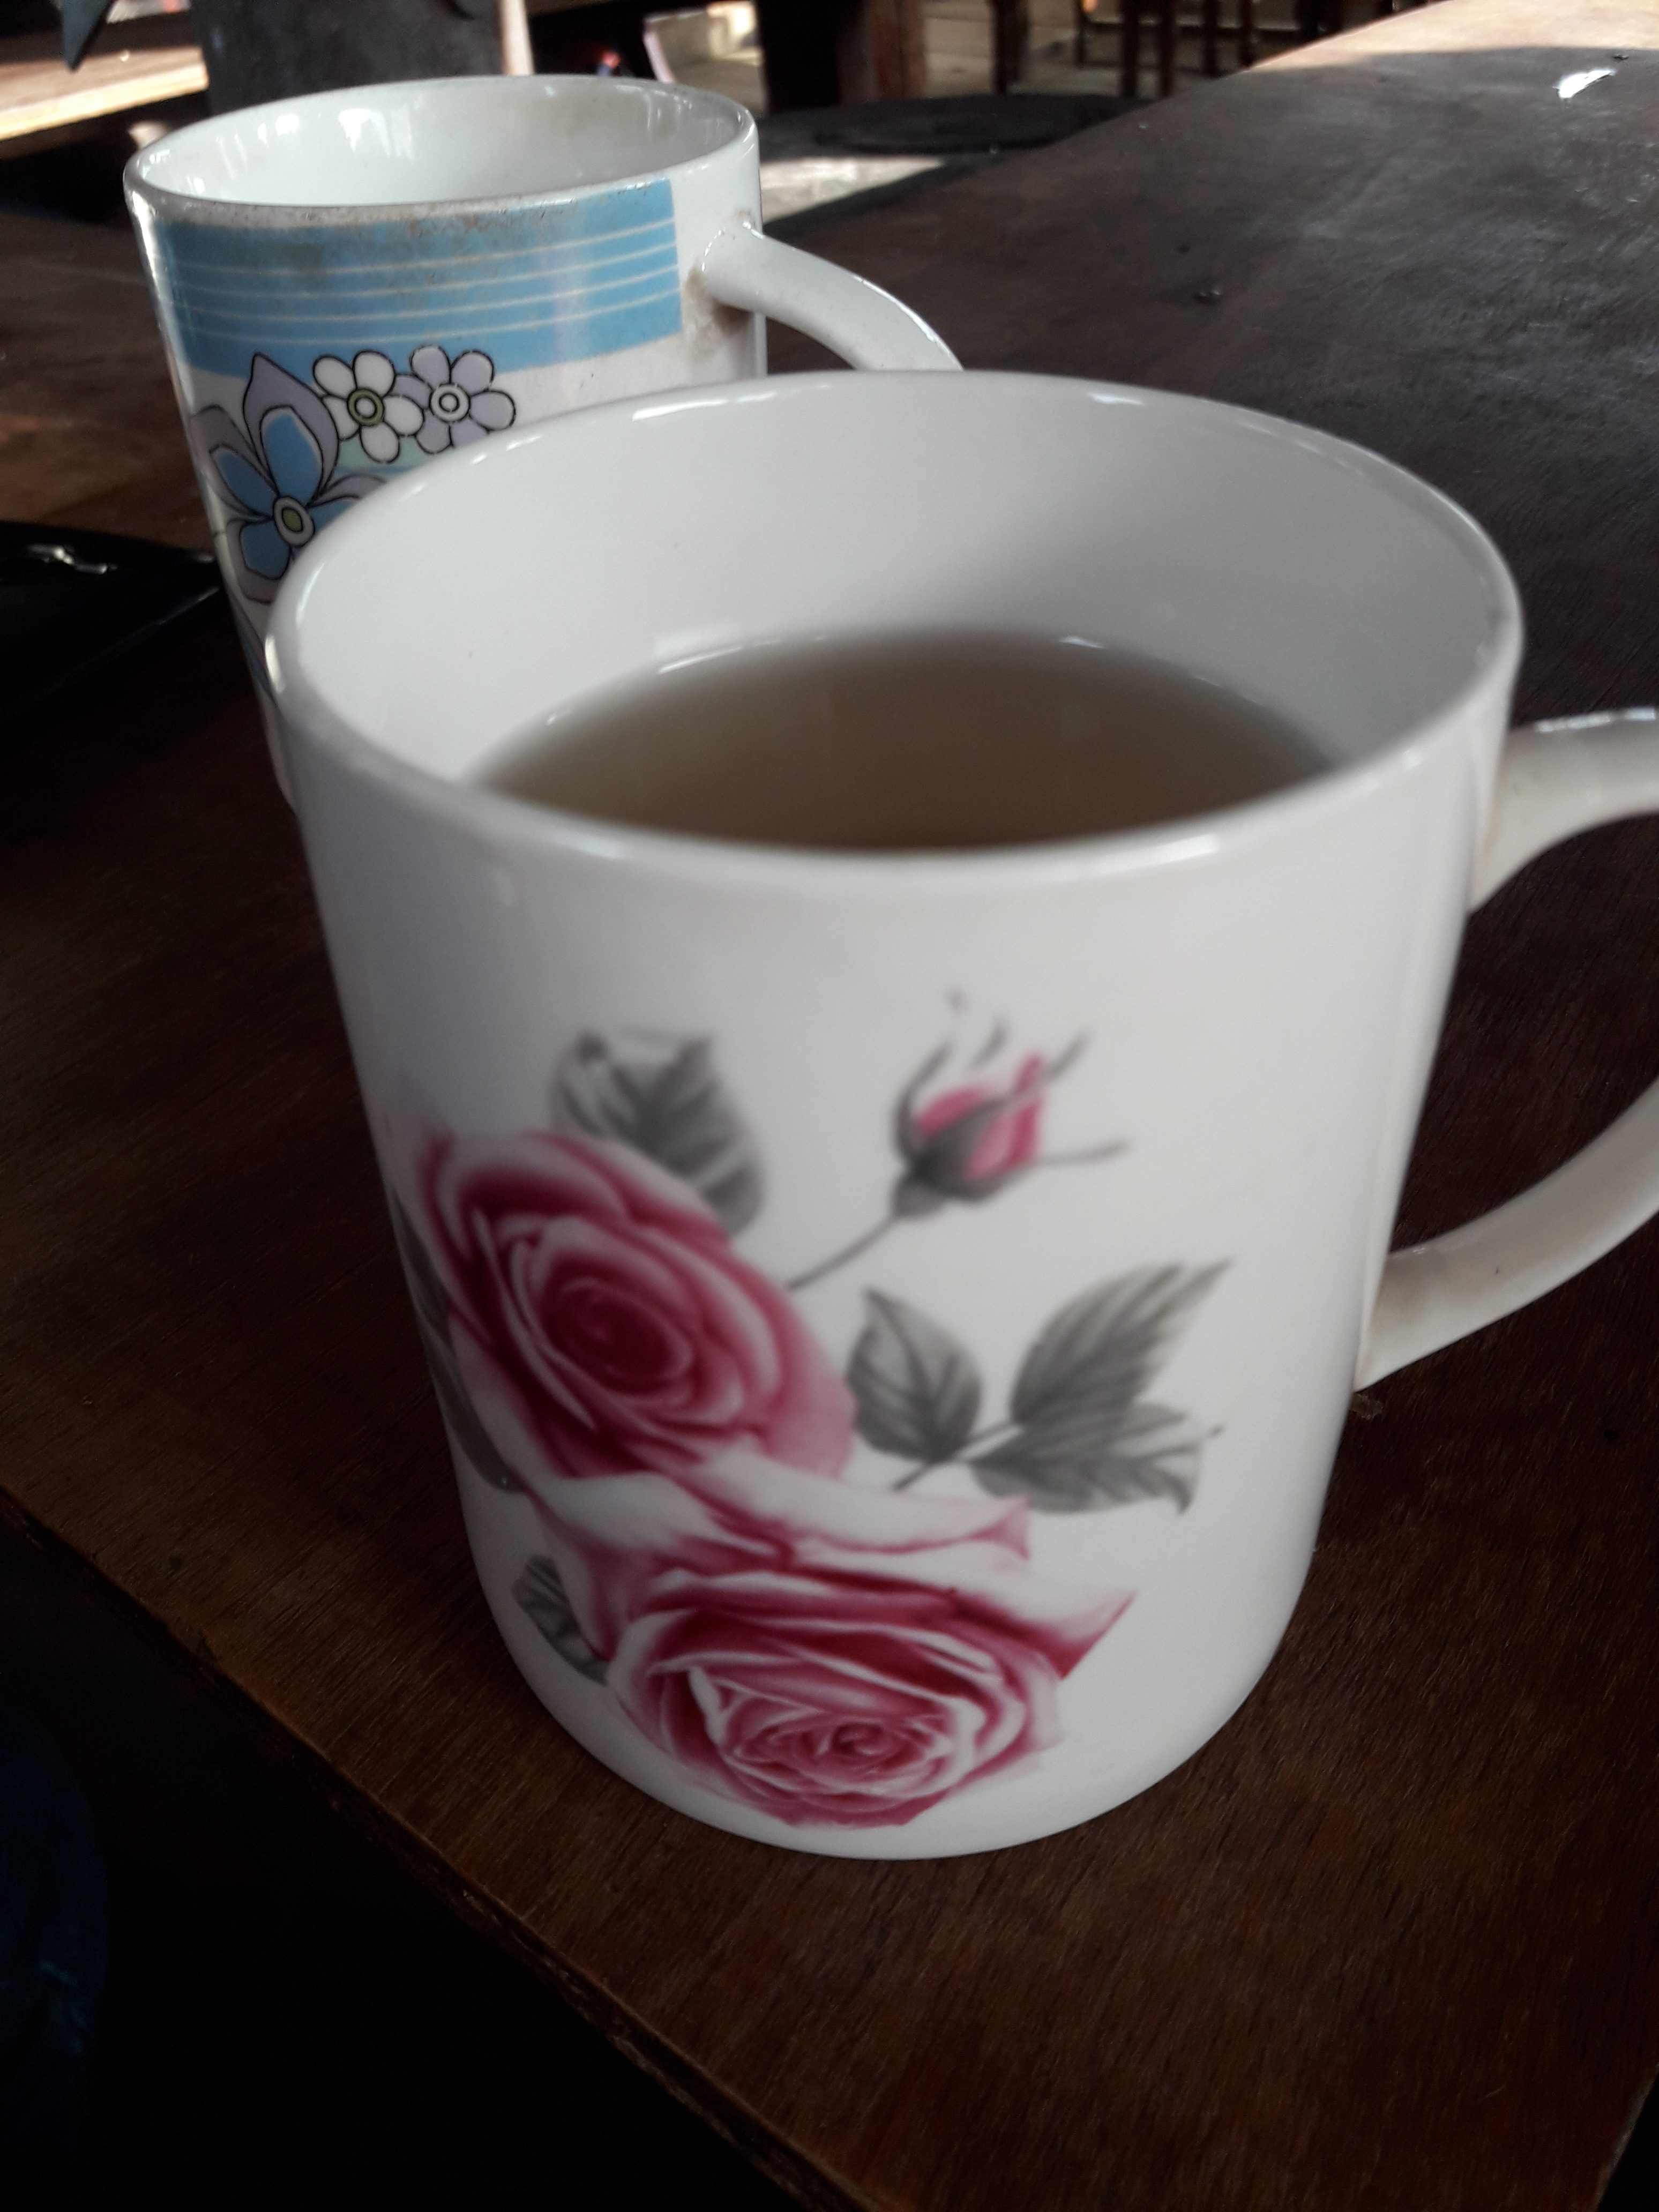
I ate a delicious meal and drank
some powerful tongba. The hot shower was the finest feature of the accommodation!
With a room fee of NPR 1000, the facility was rather inexpensive. Before
supper, I had the finest Rara noodles soup with Rayo ko Saag.
The next day, I awoke at 5:00 a.m.,
ate a delicious breakfast (honey and peanut butter pancakes with tea), and
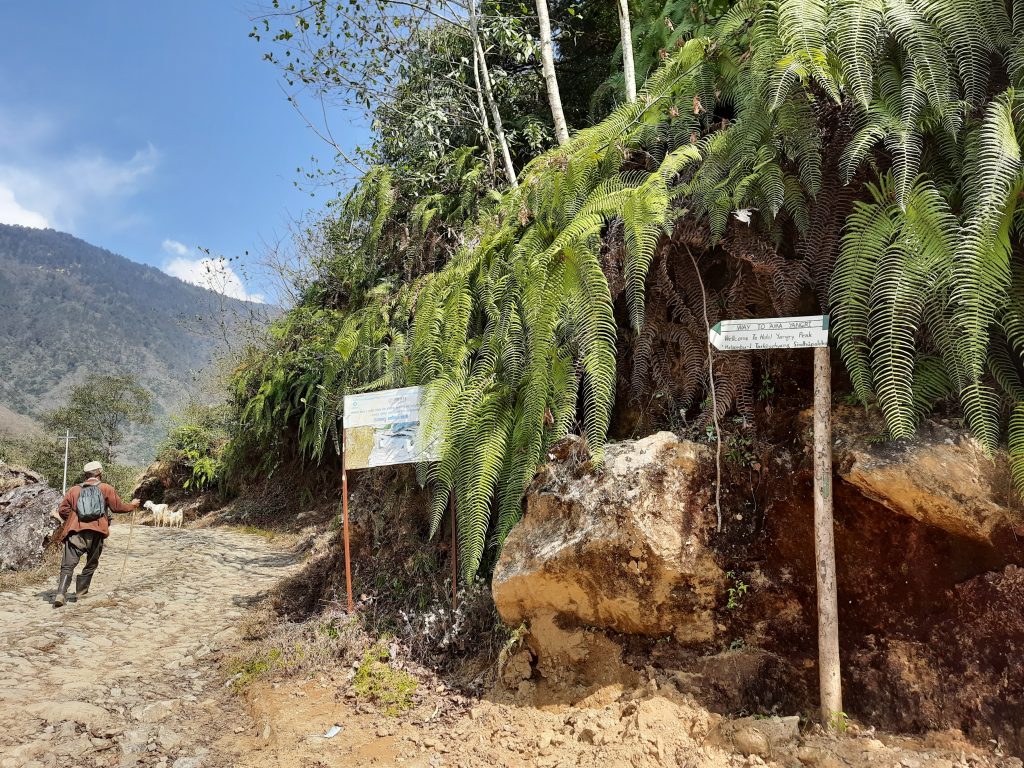
began hiking at 6:00 a.m. There are two options available. You may ride your
bike up to Jhumothang and then start walking from there. Trekkers coming from
Tarkeghyang might use a different track that has a lot of steps. STAIRS,
STAIRS, STAIRS!
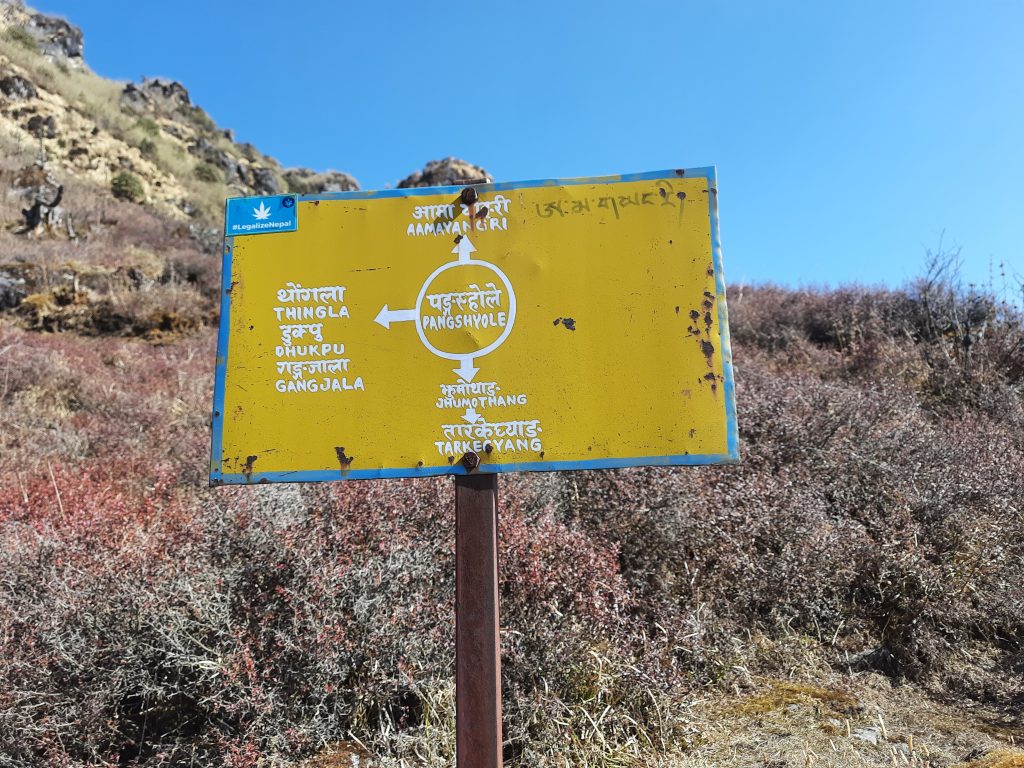
Pangshyole is the next destination
after Jhumothang. It will take you two hours to get there. It features a little
resting area with a spectacular view. The trail was not difficult for me.
However, it might be challenging for first-time hikers.
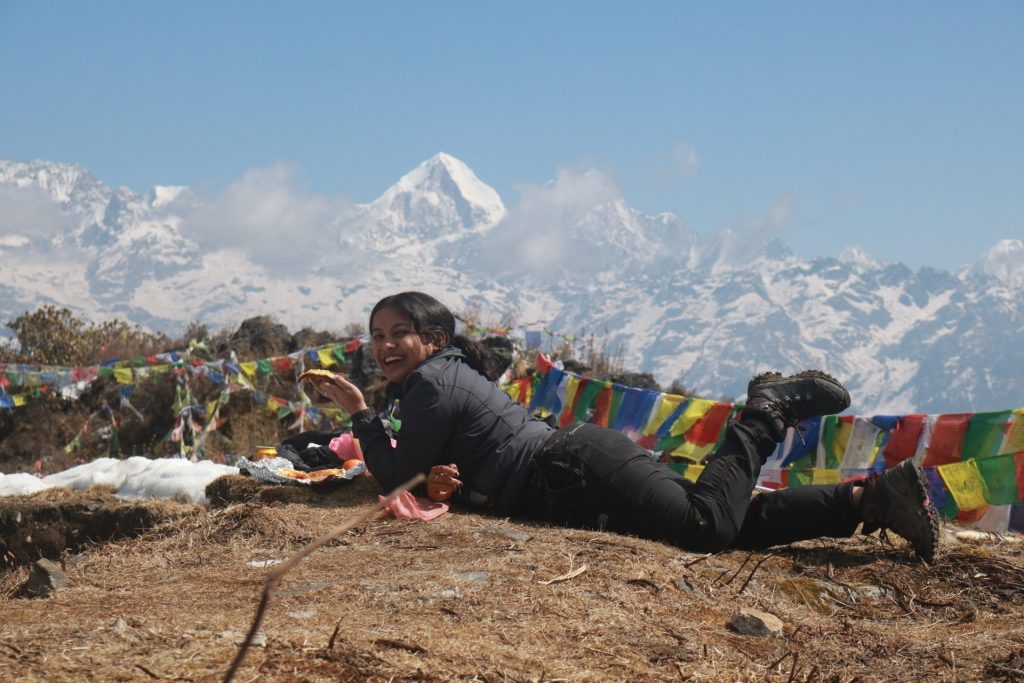
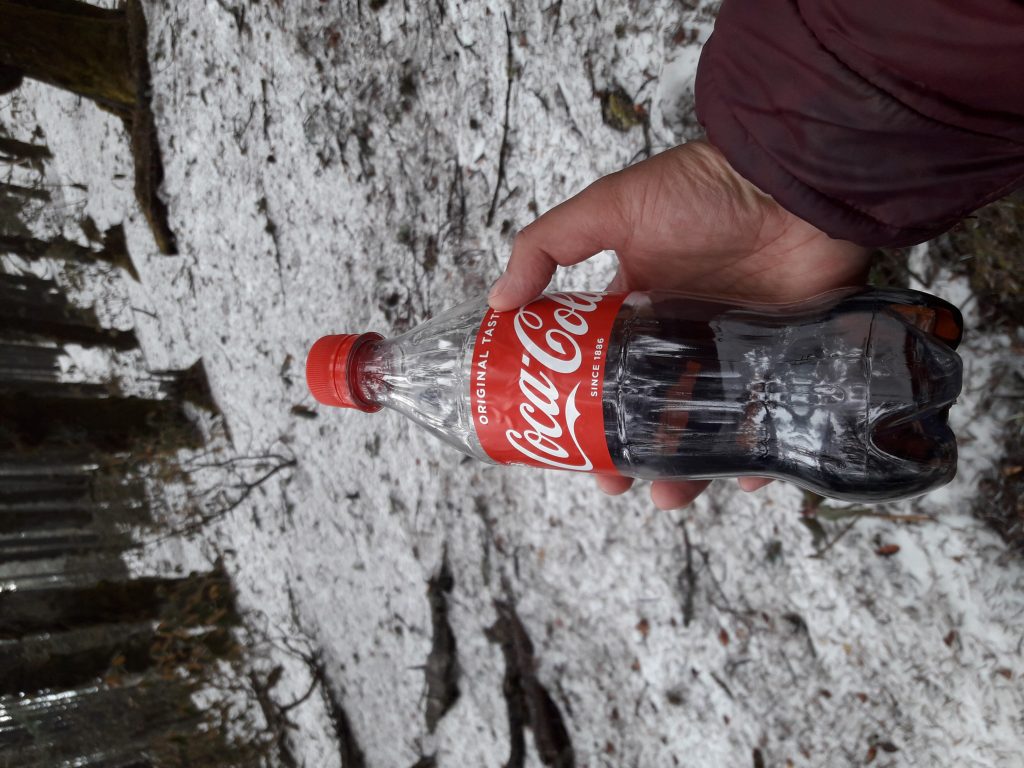
Within one to two hours of leaving
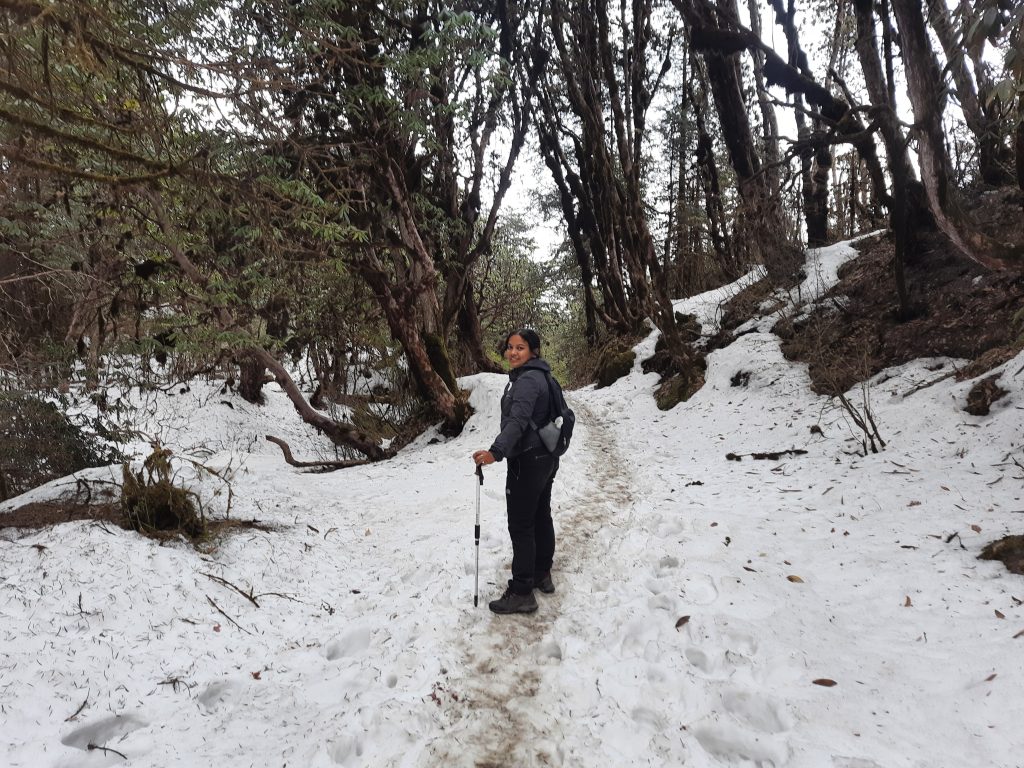
Pangshyole, I arrived at Aama Yangri Peak. The path was covered in snow. It was
also really chilly. A gumba can be found at the end of the trip (which was
under construction). The view from the location was magnificent. I
had brought some leftover pancakes and other munchies, which I ate and
carried the wrappers back to Tarkeghyang. I arrived in Kathmandu on
the same day. So, it was only a two-day hike for me.
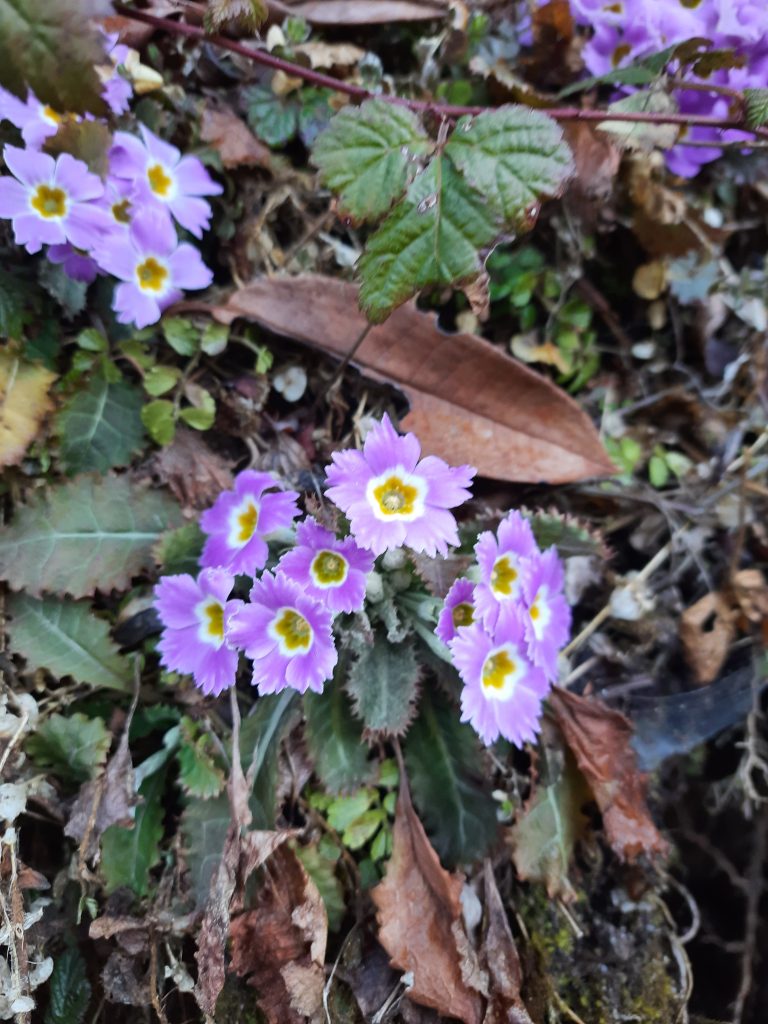
The thing I forgot to talk about is
the wildflowers along the trail. The purple wildflowers were covering the hills
so beautifully. And it also had rhododendron trees, but unfortunately, not most
of the trees were blooming rhododendrons.
If you reside in or near the
Kathmandu Valley, you should go on this tour. It has a lot to give. The
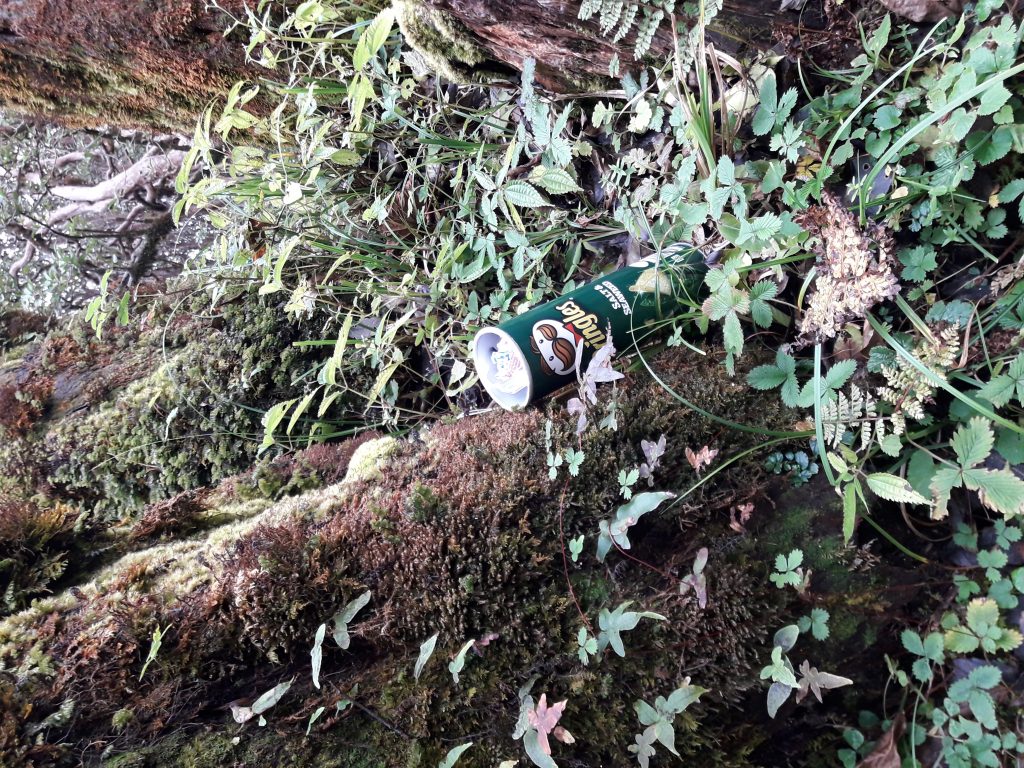
pathways are empty and ready for your footsteps. Just a small request: please
do not litter the trail. On the journey, there was a lot of garbage created by
humans.
Furthermore, if you are staying in
Tarkeghyang, speak with local residents. You might hear unexpected stories
about how their lifestyles changed after the earthquake. You’ll also appreciate
learning about their distinct cultures.
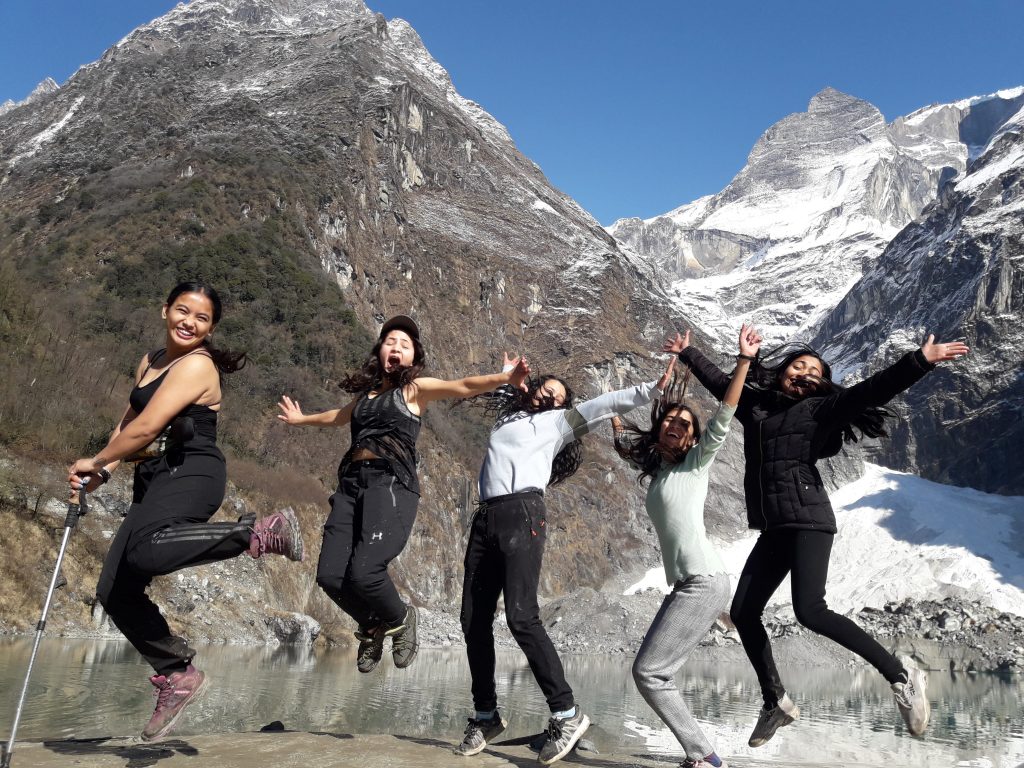
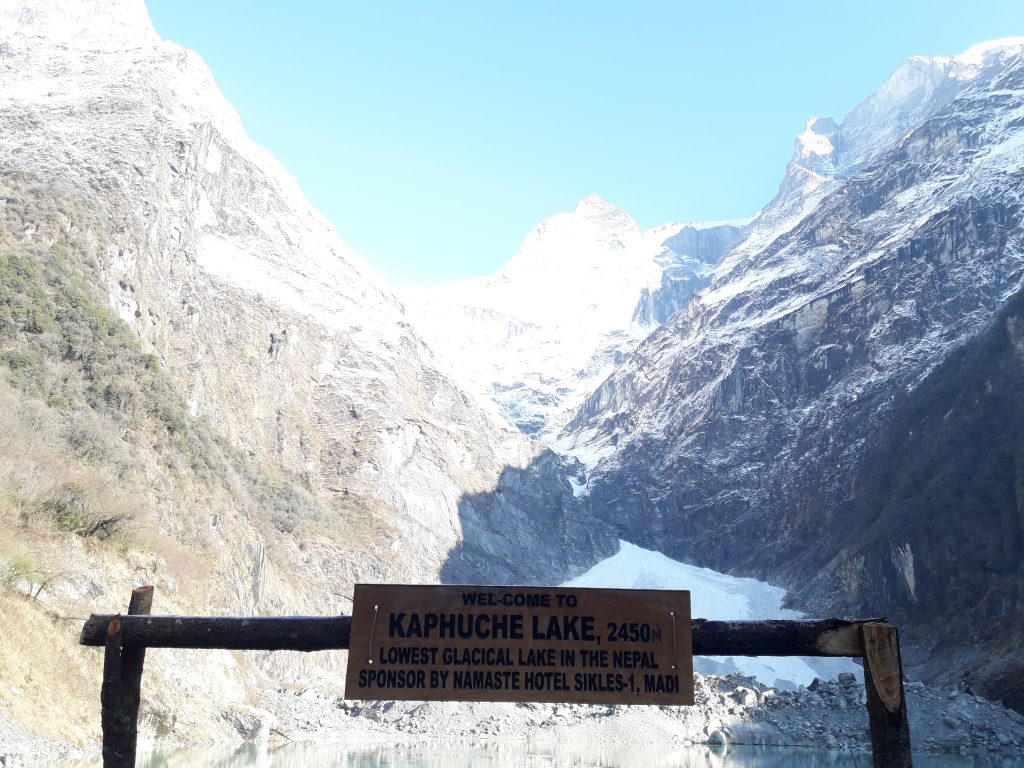
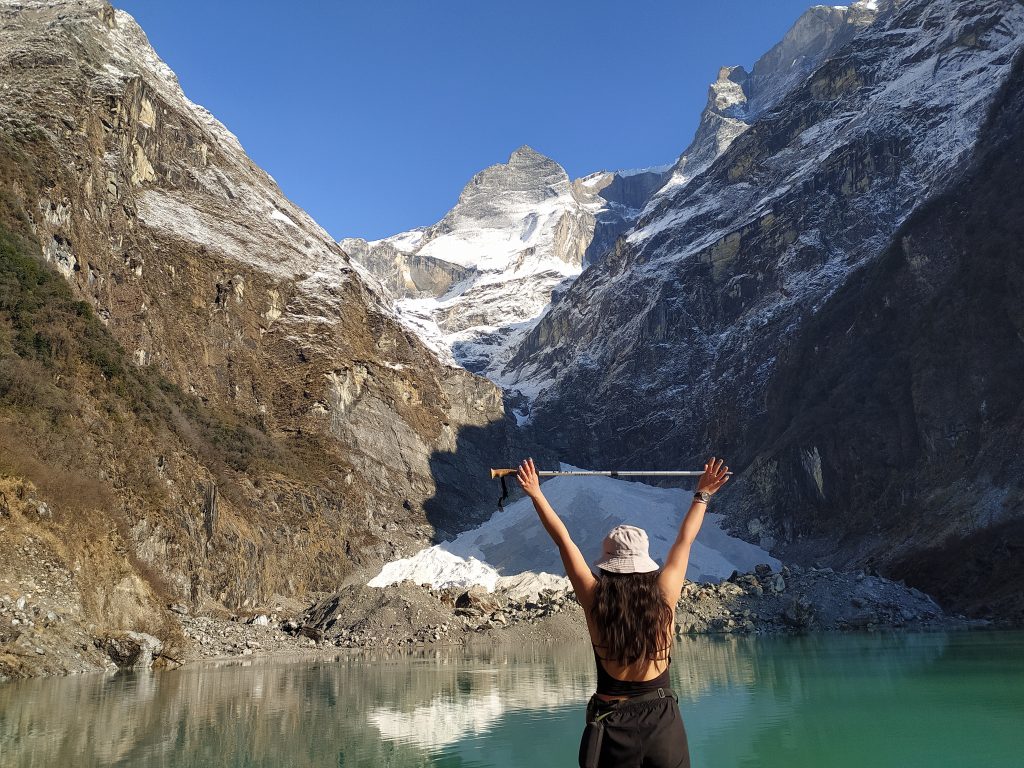
Hi, I’m Aleena. I had been to Kapuche at the end of February 2020, with four of my other friends (we were all girls) and finished the trek in three days. It was an unplanned trek and was planned during a weekend so that our college and office schedules were not bothered. We were from different places, three of my friends came from Kathmandu (night bus), one from Lamjung (a day ahead), and I traveled from Biratnagar (night bus).
It was a fun filled trek and we enjoyed a lot. If you are seeking for a complete package of trekking, this one might be your treasure. And, if you ever plan to go Kapuche, either solo or in a group, you might need to know few things as the trail is still virgin. Well, this blog can be your guide in that case. Go through it for details!
Specifications:
Altitude: 2546m
District: Kaski
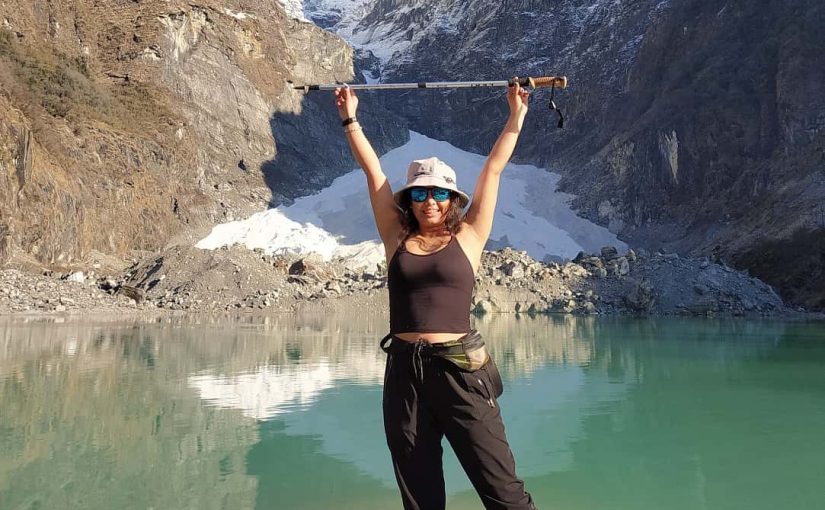
Specialty: Claimed lowest Glacial Lake in the world
Duration: 2days(from Pokhara)
Trekking hours: 8 hours for one way
Vehicle hours: 3 hours for one way
Vehicle supported: Bike, mountain bike, jeep, bus
Public vehicle available: local bus, jeep
Difficulty level: 2/5
Things To Carry:
Raincoat
Trekking poles
Extra pair of clothes and socks
Flip-flops
Snacks
Medicines
Things To Wear:
Trekking shoes
Light and loose clothes (jeans not recommended)
Sun hat
Sunscreen
Price Details:
Public bus fare from Pokhara (Sabha Griha Chowk – Buspark) to Sikles: NPR 300
Jeep fare from Pokhara (Sabha Griha Chowk – Buspark) to Sikles: NPR 600
Veg Nepali Khana Set (Sikles): NPR 250
Veg Nepali Khana Set ( Hugu): NPR 350
Temporary Raincoat (one time use): NPR 80
Per day room charge at Sikles: NPR 500 (big room, multiple beds, five people can adjust in one room)
Per day room charge at Hugu: NPR 500 (well, it’s a goth actually, that means either tent or floor to sleep on but with nice beddings)
Kodoko raksi at Sikles: NPR 60 per glass
Route & Vehicle Details From Pokhara:
Take a public bus or reserve a Jeep from Sabha Griha Chowk, Pokhara to Sikles – 3 hours drive.
Trek from Sikles to Hugu – 6 hours.
Trek from Hugu to Kapuche – 3 hours.
Itinerary
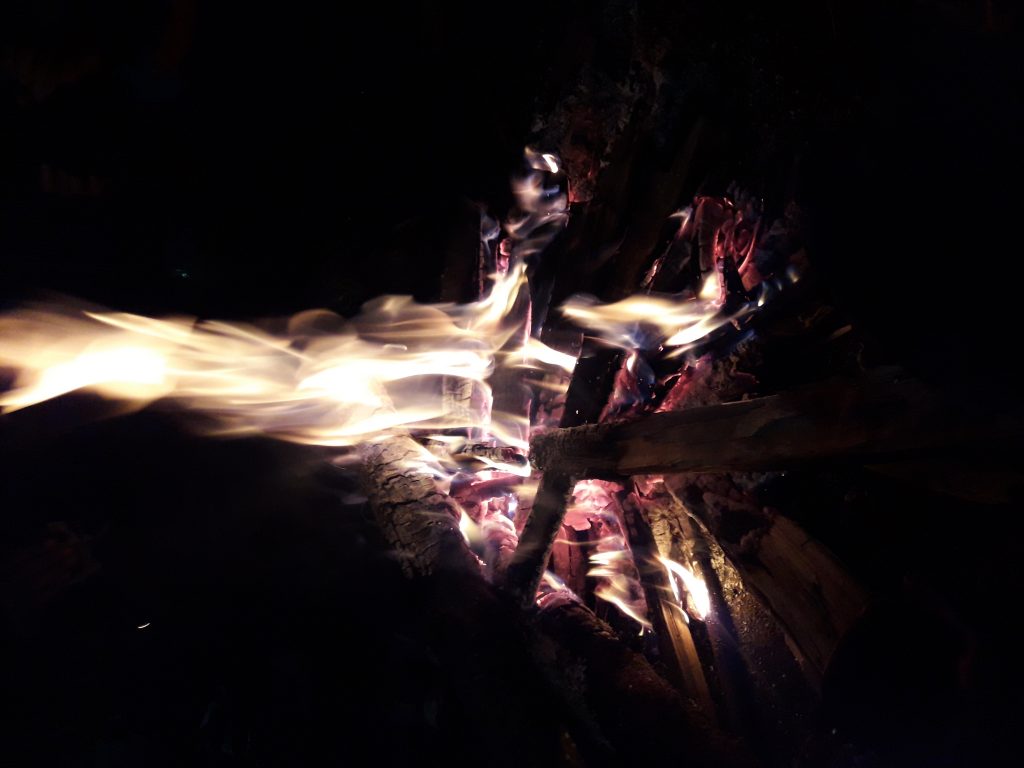
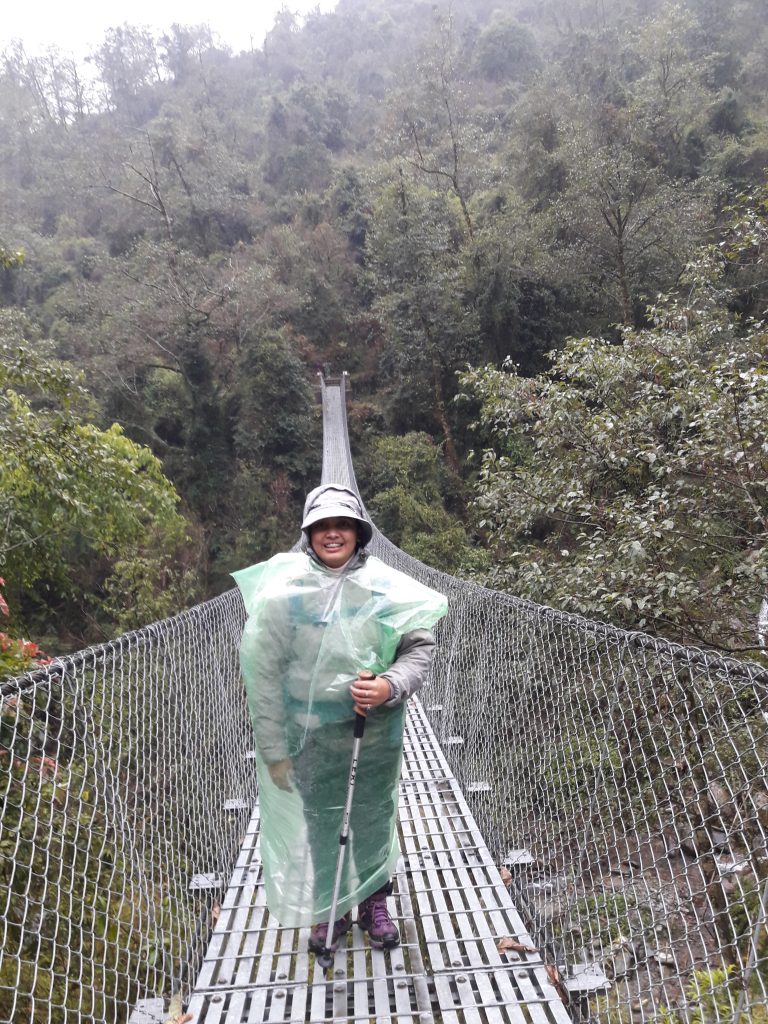
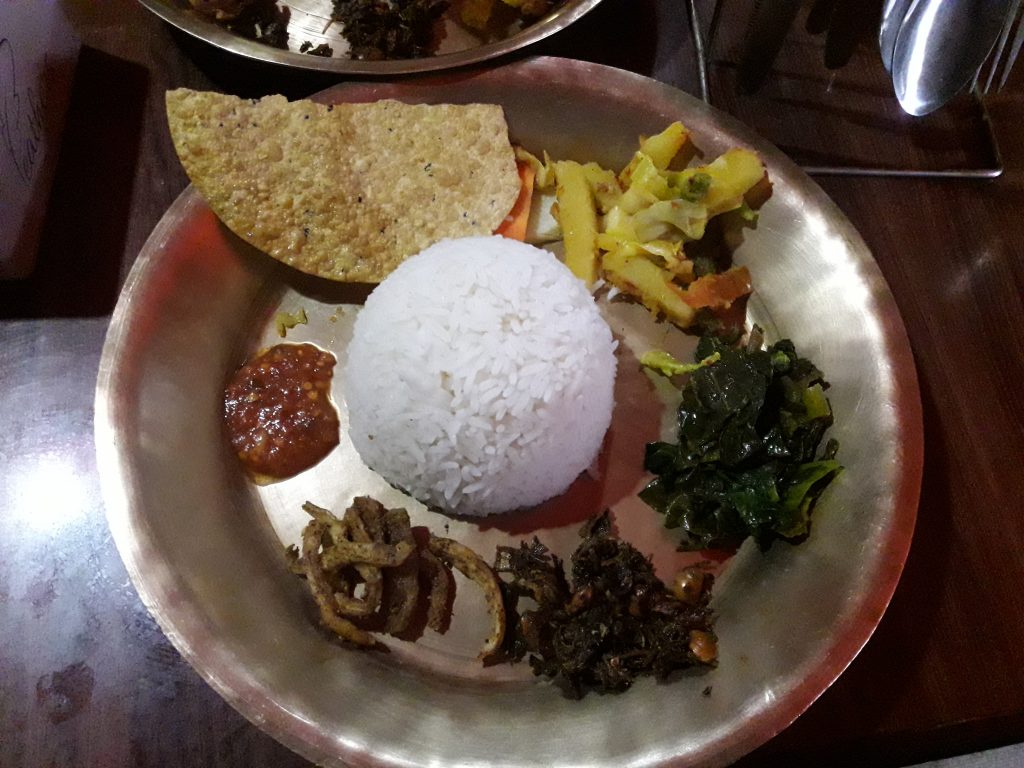
Day 1: Five of us reached Pokhara at 6 am in the morning. We took a taxi from Amar Singh Chowk to Sabha Griha Buspark. Then found a group of six other fellow people who were going to Sikles too, and joined them. The jeep cost us total NPR 500 per head that way. Reached Sikles at around 11 am, had rice there, and started trek at 12 noon. As it was raining heavily, we had to buy raincoat and worn it and reached Sikles after 5 hours of continuous trek. It was Shivaratri, we enjoyed tato Nepal khana, enjoyed fire camp, dried our wet clothes, and also accidently burnt trek shoes slightly, LOL.
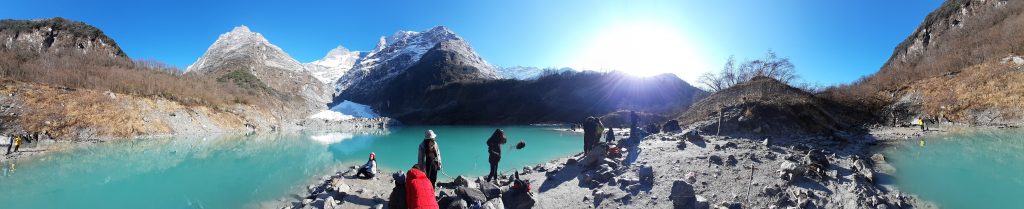
Day 2: Early in the morning, it was 5:30 am when we woke up, had tea and began trekking to Kapuche at around 7 am. It was a sunny day. We reached the lake after 3 hours of trek (with few snack breaks). The view was pleasant! We stayed there for an hour or more. Then trekked back to Hugu in 2 hours, had Nepali khana, and trekked back to Sikles in a slow pace. We reached Sikles at around 6pm. There we had Ramen challenge, & I lost, duh. We had some local kodoko jhaneko raksi which was extremely diluted, ate some snacks and slept.
Day 3: We woke up at 7 am in the morning, had tea and left for Pokhara in a Jeep at 8:30 am in the morning.
Specialties of Kapuche Trek!
You can finish this trek over a weekend! All you need is two days from Pokhara and the trek is over.
This is the easiest trek I ever had! Despite all the rainfall all day, slipping into few down-hills, having all the trekking gears wet, and burning trek shoes with my own stupidity, I still found it an easy trek.
It is a safe trek for solo travelers!
You get nice hospitality in Hugu. Plus, it is super cheap. As there are only few places to stay, make sure you book one for yourself!
This I would call a virgin trail, there is no comfort for you, and you will not find even a single resting place, which is the best part!
Well, who would not like to flaunt “I have been to the world’s lowest glacier lake”? Of course everyone would love that. So, go there!
There is no chance you get to buy coke or snickers after you begin trekking from Sikles. So, carry whatever you might crave during the trek. Well, carry your wrappers back with you like a good human!
Local kodoko raksi, Nepali tato khana, amazing Mountain View, nice weather, amazing breeze, and what else? You get these in Sikles as well.
Hope this article helped you in some ways. Even if this one is your first trek, you need not panic, it is easy, safe, and the view is awesome! If the blog was worth reading, do share and leave your feedback.
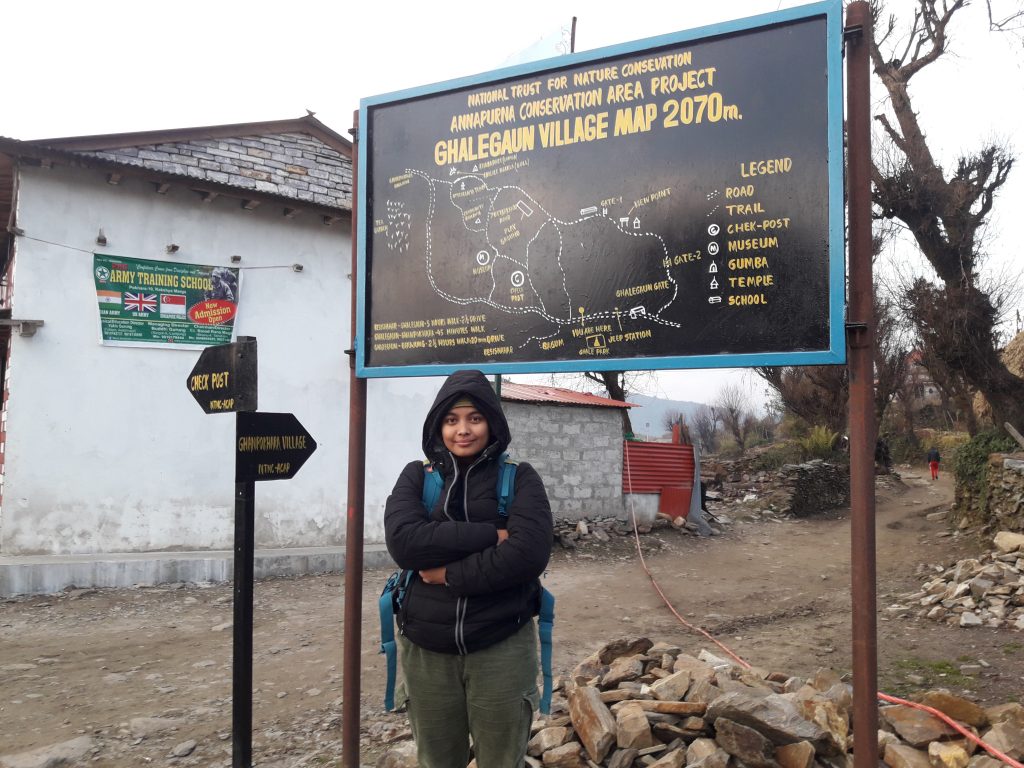
Ghalegaun is one of the villages in Lamjung, Nepal that is popular for its scenic beauty, cultural experience, and great hospitality. Considered as the cleanest village, Ghalegaun is one of the popular destinations for people who are willing to escape the horrific city schedules and regular life. The people in Ghalegaun are mostly Gurung and are more than happy to serve you the local experience with home-stay accommodation, local food & drinks, and cultural clothes.
I recently made a two days trip to Ghalegaun, from Kathmandu on 15 & 16 January as my first trip of 2020. I had not been to Lamjung before but I had heard a lot about the alluring beauty of this place. So, as soon as my college’s winter vacation started, I packed my bag to step on a new district which happens to be my 49th district to step in Nepal so far. I went along with one of my friends. She had not been to Lamjung before either.
So basically, I shall not bore you with my unnecessary
lectures and directly get into the points that shall help you make this trip
worth.
Number of days: 2 or 3 Vehicle Type: Bus, micro van, Jeep Travel Area: Ghalegaun, Lamjung Altitude: 2070m
VEHICLE &
ROUTE INFORMATION:
The vehicle for a local trip from Kathmandu can be a bus or
a micro van. If you have private car or motorbike, you can take it. But if you
are willing to hire a bus, you might face problem after Besisahar, as the road
is off-side and during monsoon, or mild rain, the roads can be quite crazy for
a bus.
If you prefer a local vehicle, you can get one from Gongabu Bus Park in Kathmandu till Besisahar, Lamjung. The first bus or van will leave from Kathmandu at 7 am in the morning; the 2nd will leave after one hour, and the last one by 9 am. You can pre-book your ticket or simply reach the Bus Park a little early.
From Kathmandu to Besisahar, it costs NPR 450 in a bus or
van that will take you to Besisahar in six hours. From Besisahar, you shall
find a Jeep that shall take you to Ghalegaun in 2 to 2.5 hours for NPR 350.
Most people also make a trek from Besisahar to Ghalegaun which can be 4 to 6 hour long trek depending upon one’s speed. It is also one of the popular hiking destinations.
COST
ESTIMATION OR BUDGET
Bus fare: NPR 450 / $4.5 (one way), from Kathmandu to Besisahar Jeep fare: NPR 350 / $3.5 (one way), from Besisahar to Ghalegaun Vegetarian lunch or dinner (rice, daal, vegetables): NPR 200 / $2.0 Breakfast (Kodo ko roti, beans, boiled egg, tea): NPR 200 / $2.0 Room (per person): NPR 400 / $4.0 (two people can stay in a room for NPR 800) Gurung Cultural Dress: NPR 100 / $1.0 without ornaments & NPR 300 / $3.0 with ornaments Firewood for camp-fire: NPR 500 / $5.0 per stock
SPECIALTY OF GHALEGAUN:
You get to stay with the local families and learn very closely about Gurung culture
You can taste local kodo-ko-raksi (local alcohol) which is pure and tastes good
You can taste local breakfast like kodo-ko-selroti which is fresh and healthy
You can wear Gurung cultural dress and feel like a Ghale for real
You can enjoy hiking, sunrise, and visit to Chiya-bari (tea plants)
It is cheap with the taste of local village life
5 REASONS
TO VISIT GHALEGAUN
If
you are looking for a complete escape from regular schedule, this trip provides
you total refreshment with peaceful environment. If you are in a group of
either friends or families, you can enjoy this place as it provides you private
yet open space for group enjoyment.
You
can do camp-fire, eat local food like kodo-ko-roti, and have local drinks at
cheap price.
You
can make another day stay at Bhujung village which is 8 km far from there and
provides another home-stay experience. You can either take a Jeep or hike to
that place.
One
can experience Ghale-lifestyle & learn about Ghale cultures by staying with
local families, & wearing Gurung cultural dress (on rent).
It
is a safe destination for solo, group, and couples. The place is popular yet
very peaceful &cheap.
Ghalegaun is also known as Gurung Heritage Trek. It lies
between Marsyandi River in the east & Madi River in the south-west. There
are some other places famous along with Ghalegaun which are Bhujung, Khudi,
Pashgaun, Pakhrikot, & Tumsikot.
Ghale Gaun has been a really popular destination after the collaboration of Nepal Trust for Convervation (NTNC) & the Annapurna Conservation Area Project (ACAP).
So, pack your bag and make a wonderful trip to Lamjung!
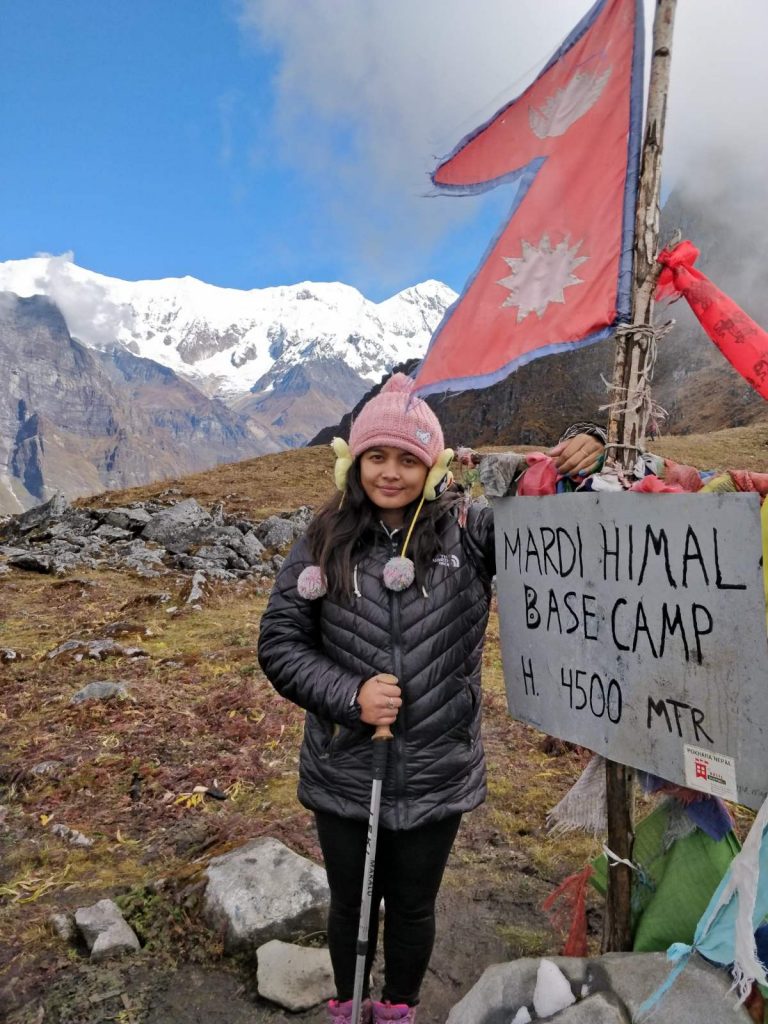
ABOUT: Destination: Mardi Himal Base Camp District: Kaski Altitude: 4500m Month: Mid October Days: 3 to 4 Difficulty: 3/5 Budget: NPR 8k to 10k (From Pokhara & back to Pokhara)
Mardi Himal Base Camp, 4500 m
THINGS TO CARRY:
*Main Gears Required: -Trekking bag (50 to 60 liters) -Trekking pole (1 or 2) -Trekking Shoes or shoes with good grip -Heavy wind-proof jacket & light wind-proof jacket -Slippers -Leggings or flexible pants -Full sleeves t-shirts -Gloves, Woolen Cap, Scarf, Sun-hat -Rain Coat -Torch -Power Bank -First Aid *To Avoid Altitude Sickness: -Garlic -Ginger -Gram Flour *To Avoid Leeches: -Salt
BUDGET ALLOCATION: -Taxi from Pokhara to Dhampus: NPR 3500 (for entire group) -Lunch/ Break-fast/ Dinner: NPR 400 below Middle Camp & NPR 500 above Middle Camp -Lodge room: NPR 500 for a single room with multiple beddings. -Mobile Charge: NPR 200 -Power Bank Charge: NPR 1000 -Hot Water per liter: NPR 100 -Jeep from Sidhing to Pokhara: NPR 8000 (for entire group)
The Mardi Himal Base Camp itinerary is simple and it can be
accomplished in 3 days if you are an average trekker. I completed my trek in 60
hours. I’ll provide you the details as per my experience in this blog.
Before going into detailed information, below find the compressed itinerary about the Mardi Himal Base Camp. This can be a perfect guide for you. The itinerary begins from Pokhara and ends at Pokhara.
DAY 1: Take a taxi from Pokhara to Dhampus not later than 5:30 am. There are local buses available as well but not before 7 am, which can cause delay. After around 2 hours of ride, you reach Dhampus. Begin your trek from there. After 6 to 7 hours of hike through the forest, you reach Forest Camp. This is the first night stay of your trek.
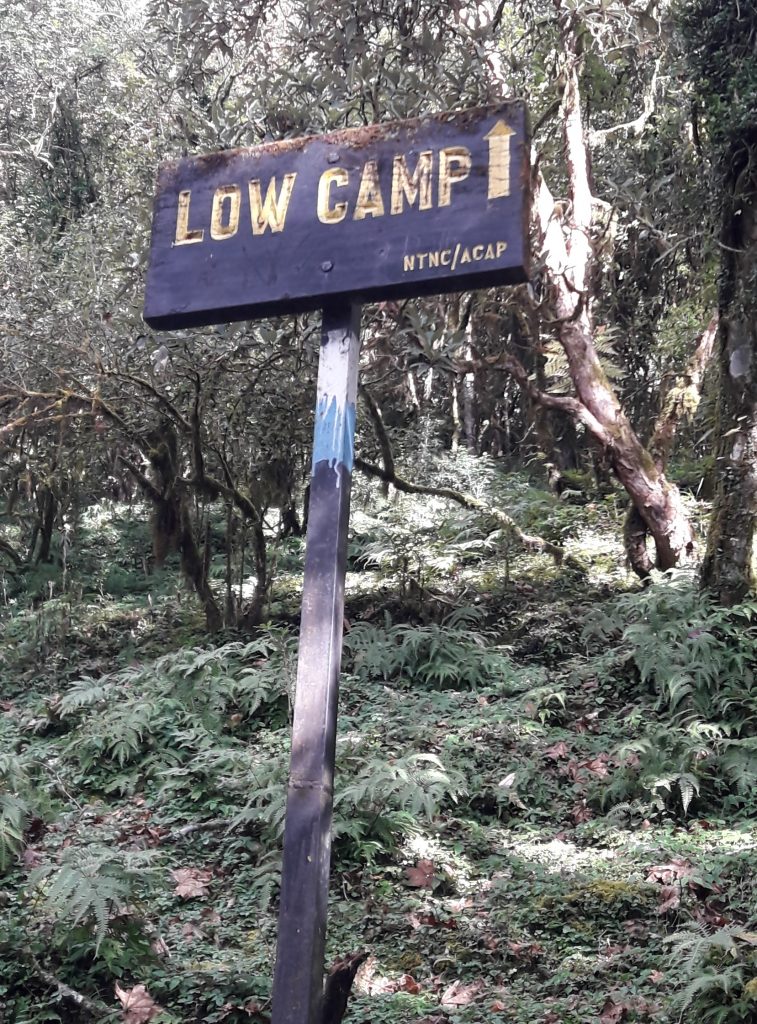
DAY 2: Begin your trek early in the morning not later than 7 am if you decide to take your breakfast there. If you skip breakfast at Forest Camp, you can start your trek not later than 6 am and have the breakfast in Low Camp which is 2 hours trek from Forest Camp. From Low Camp, you will reach Middle Camp in another 2 hours. After that in another 1 hour you will reach Badal Danda. Then, after another 2 hours you are in High Camp. This is where you stay on your 2nd day of trek.
DAY 3: To see the view you need to begin the trek super early in the morning. Start your trek at 3 am to 3:30 am in the morning. You can leave your luggage in High Camp and simply walk without any loads. You need to carry torch. After 3 hours you reach view point. Most people return from here as they see the same view from the base camp too. The base camp is after another 6 hours. After you return from base camp to high camp, you can choose from two ways. Either return the same way you came, or take another way through Sidhing. From High Camp, it will require you 7 to 8 hours to reach Sidhing. From there you can take a local bus or reserve a Jeep to return Pokhara in 2 to 2.5 hours ride.
DETAILED ITINERARY: There are several things one has to keep in mind while going on a trip that includes climbing hills for days. In Mardi Himal Base Camp trek, one has to have detailed information about the place, route, lodges, difficulties, equipment, gears, food, etc. that cannot be missed.
Mardi Himal Base Camp lies in Kaski district of Nepal. It is
surrounded by Annapurna Himal & Machhapuchre. The base camp lies at 4500m
altitude. The trek begins from Dhampus and ends at Sidhing.
It was Tika ko din, Dashami (8th Oct.) when I took a bus from Ithari to Narayangarh as there was no direct bus to Pokhara on that day. From Narayangarh, I took a bus to pokhara and reached there on 9th Oct. That day I enjoyed exploring Begnas Tal.
The next day was the day when the trip finally began. I took a taxi from Birauta, Pokhara and reached Dhampus at 7:30 am in the morning.
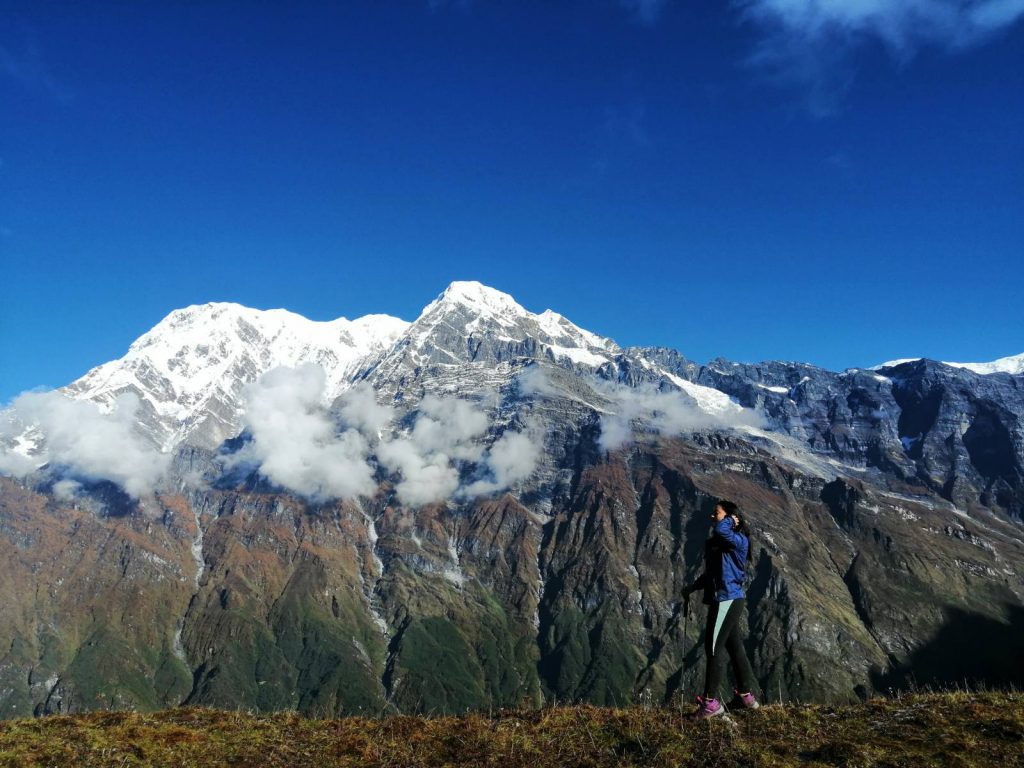
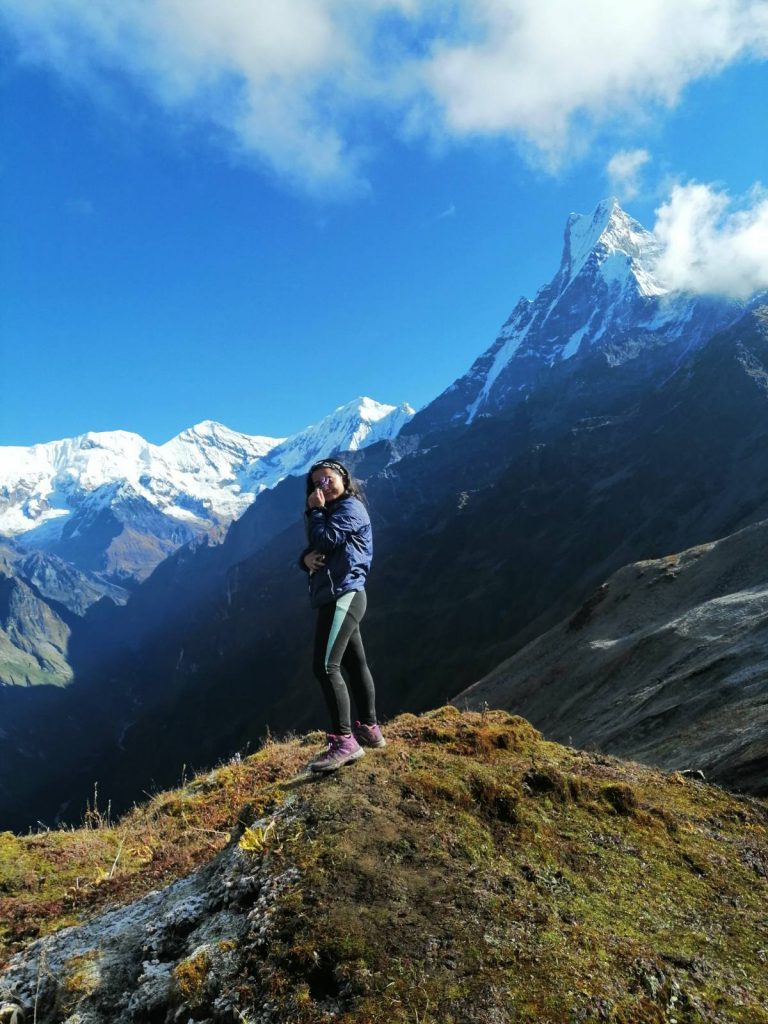
At Dhampus, I ate saatu mixed with milk tea. Carry saatu (gram flour) along with you as it can be a good source of energy. The trek began from Dhampus. The day was sunny (10th Oct.) and the beautiful view of Annapurna and Machhapuchhre were easily visible. The route had a lot of trees and shades. As I’m scared of leeches, I was constantly checking my trekking shoes. I found one leech on my trekking pole and some on the ground, but gladly, none could stick on my skin.
Talking about leeches, the best thing is carrying salt. Sprinkle little salt inside your shoes which shall repel leeches. This time of the year is actually leech free but you should not take risk. Some of my friends got leeches on their feet that also made some painful scars.
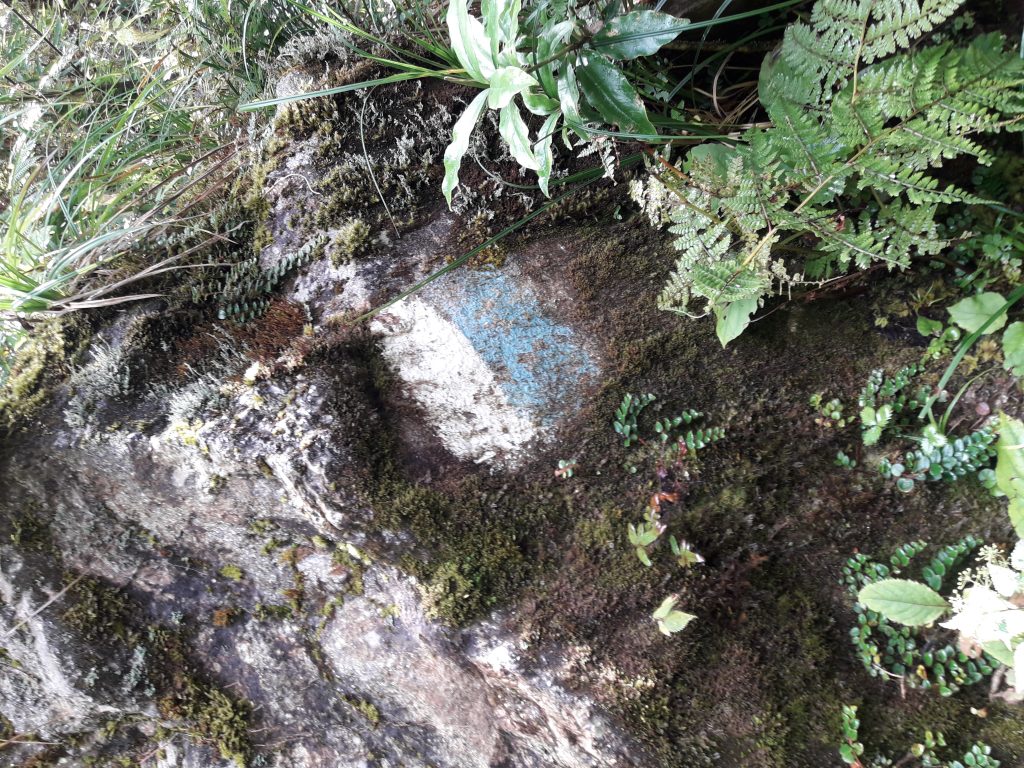
The best part about the Mardi trek is the route and the directions. There are marks on either trees or stones on the way to the base camp from both routes (Dhampus and Sidhing). The mark includes sky blue line followed by white line. The white line is visible even in the dark.
Indicating signs for correct route
On my way up to Forest Camp, I ate a packet of wai-wai, an
apple, a snicker, few almonds, little bhatmas, and a cup of tea. I skipped
lunch and I don’t know why my appetite was lost!
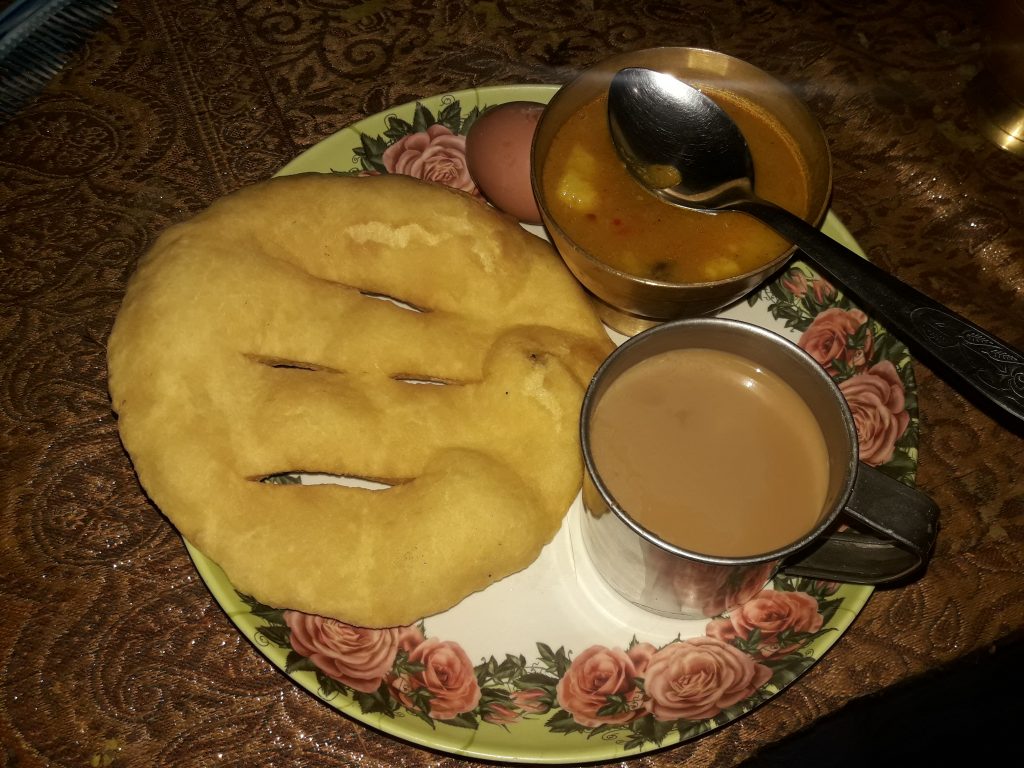
I reached Forest Camp at 4 pm in the evening. The room was already booked at Mardi Guest House. I had dinner there. The room was cosy. Well, the guest house was entirely packed. There are around 10 other guest houses too. Food contained rice, daal, chips, bhatmasachaar, soyabean aalu. It was NPR 400 per plate. The room was NPR 500 with three beds. Next day, early in the morning, after all the morning chores, took my breakfast for another NPR 400 in the same hotel which contained puffed bread, milk coffee, boiled egg, chana–aalu. Filling a bottle of 1 liter was NPR 100.
Breakfast at Mardi Guest House
The day-2 trek began at 7 am in the morning after heavy breakfast and carrying same old load. The day-2 trek was quite difficult as the slope was more and the ground was mostly covered with stones. But as I had already walked for a day, I was adapted to carrying the load and walking. The day-2 trek was insanely beautiful. It had a lot of variations. It was forest mostly.
The ground was moist yet, there was no sign of leeches on the 2nd day. I reached Low Camp in 3 hours.
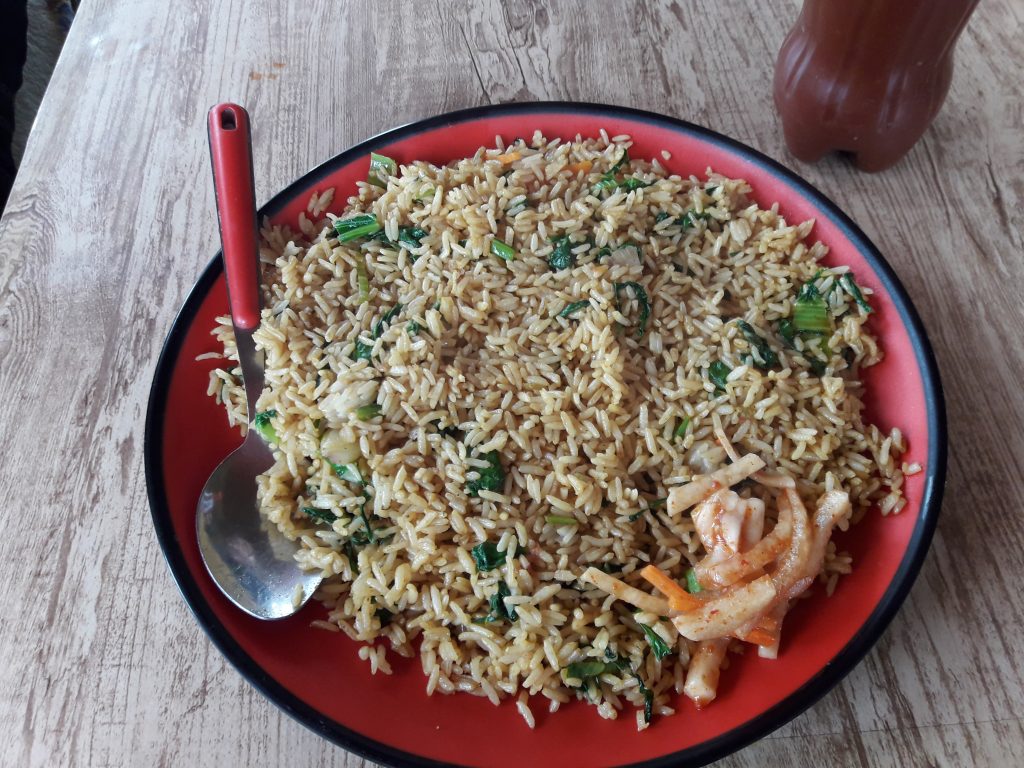
There I didn’t take a break. Continued my trek then I reached Middle Camp where the view was astonishing. I was kind of hungry but I still had to cross Badal Danda to reach High Camp. At Badal Danda, I ate fried rice for NPR 430. The rice was stiff yet spicy so could eat. My appetite was lost but I managed to eat 50% of the fried rice.
Fried Rice t Badal Danda
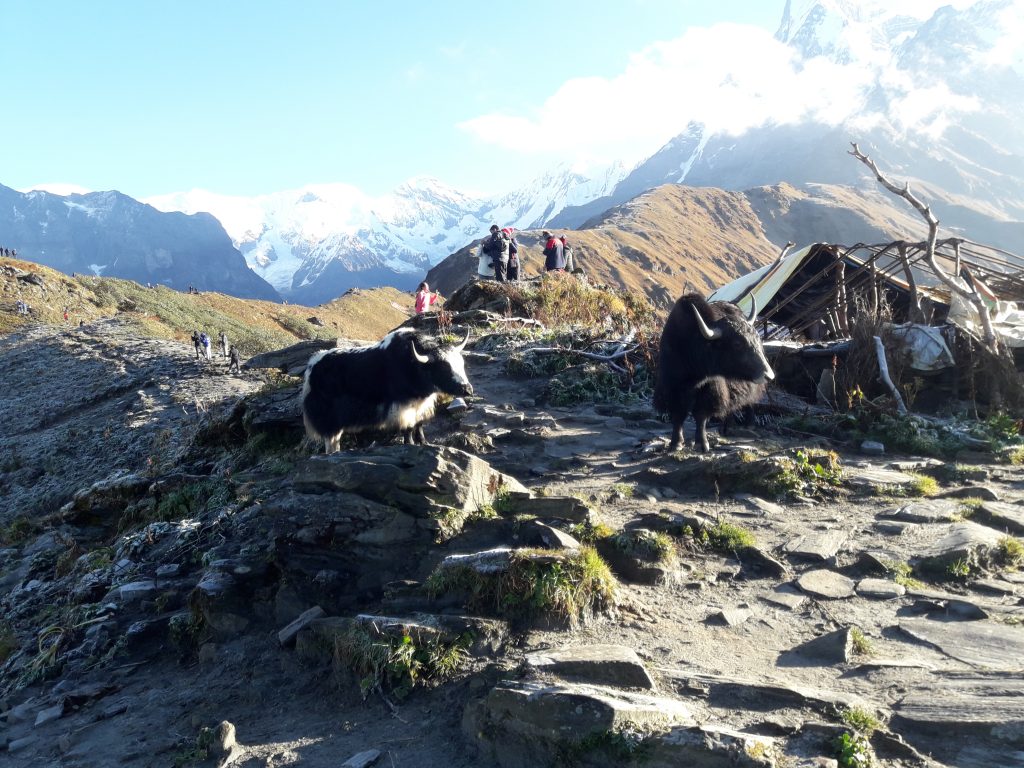
From Badal Danda, the trek continued. There were a lot of Horses on the way. The poor creatures are the only source of transportation there. They carry heavy stuffs like gas cylinder up in High Camp. It started raining and my raincoat came handy. It was nearly 4 pm when I made it to High Camp. My speed is more than this but I had to wait for my friends, therefore, it became late.
Yaks
After reaching the High Camp, I went the lodge where the booking was made for the five of us – Double View Hotel. Unfortunately, because of many people, the lodge was packed as well. There was space available only in the dining room. More than 15 people stayed there along with me and my team. Dinner had rice, daal, soyabeanaalu, bhatmassadeko, salad, prawn chips, papad, and chilly fro NPR 500. It was wonderful in the evening as there was musical session. A famous band from Pokhara was there and they began singing and playing instruments. What else? I joined them and enjoyed and made it to bed at 10 pm.
Day-3 was weird yet amazing. My entire adventure lies on
this day! It is funny, but I almost died lol.
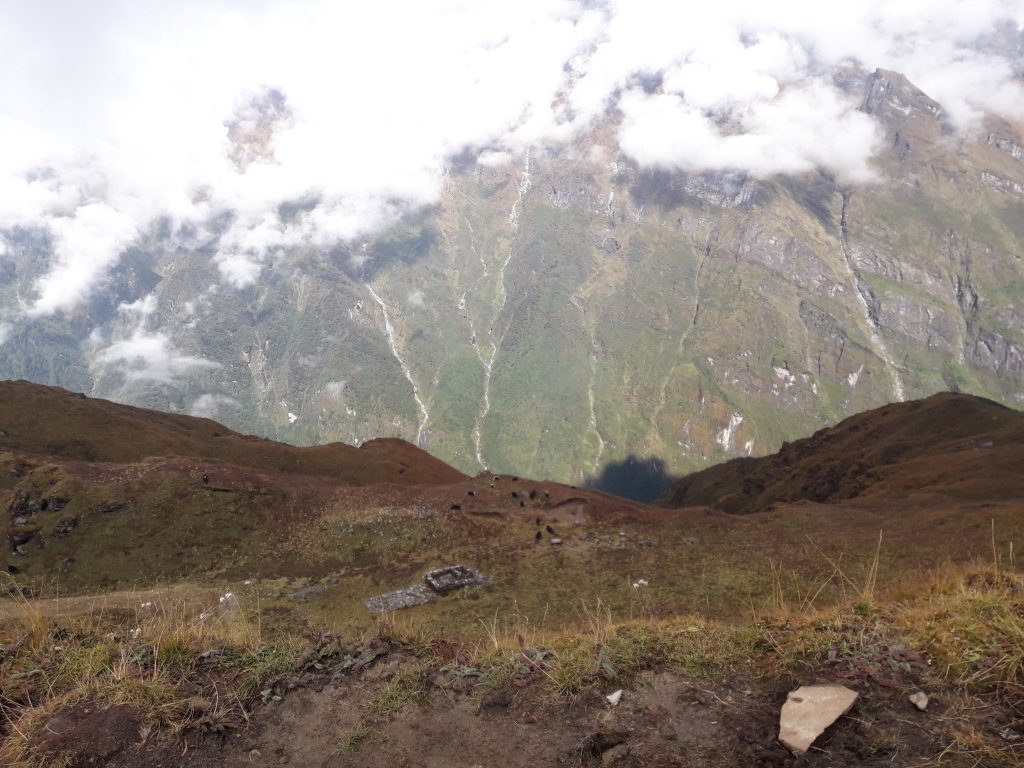
I woke up at 2:45 am in the morning after less than 5 hours of sleep. After being fresh, consumed saatu mixed in hot water. It was super cold, had to wear heavy wind proof jacket along with gloves and woolen cap. The luggage was left behind as we were to return back to the same place while returning. It was dark and cold. Carrying a torch, the trek began at 3:40 am. The route was very difficult. This has to be the most difficult one out of all. There were several people on the way and you could see a route forming with the lights carried by people. Some of them were returning back as they suffered from altitude sickness. Some of them returned back because of fear. I was sucking ginger all the time to make myself warm. After 4 hours, I made it to view point. From view point, one can see Machhapuchhre, Annapurna, and Dhaulagiri. There I consumed ginger tea for NPR 250! This has to be the most expensive tea I ever consumed in my life!
A Mesmerizing View from View Point
After spending one hour there, I trekked further to reach base camp after 2 hours. The base camp had only one tea shop. That was the final destination of my trip! I consumed another cup of tea for NPR 150 & Rara soup for NPR 250.
Tea in Base Camp
Rara Soup in Base Camp
After spending another 1 hour there, I returned back. While returning, I took another route as the route I used for climbing from High Camp to Base Camp was tough. This made me return back to High Camp by 12:45 pm. There I waited for all my friends as I was the only one who returned back fastest. I had lunch which was just like dinner a day before for another NPR 500. The stay for five people only required NPR 500.
Lunch at Double View Hotel – High Camp
While returning back, I took the other route as recommended by everyone. It was High Camp to Sidhing. The estimated time to trek was 4.5 hours but it was a lie! None of the trekkers could complete that route with that least time. My friends were already tired and could not walk faster. As I had an important task in Pokhara the next day, I had to reach Pokhara that night. Therefore, I was focused and continued walking without taking any rest. From High Camp, I returned at 2:30 pm and reached Sidhing at 9:30 pm. Then took a Jeep back to Pokhara and reached Pokhara at 1:00 am in the morning. This is how my trek was completed.
One of the five rivers that lies on the way from High Camp to Sidhing
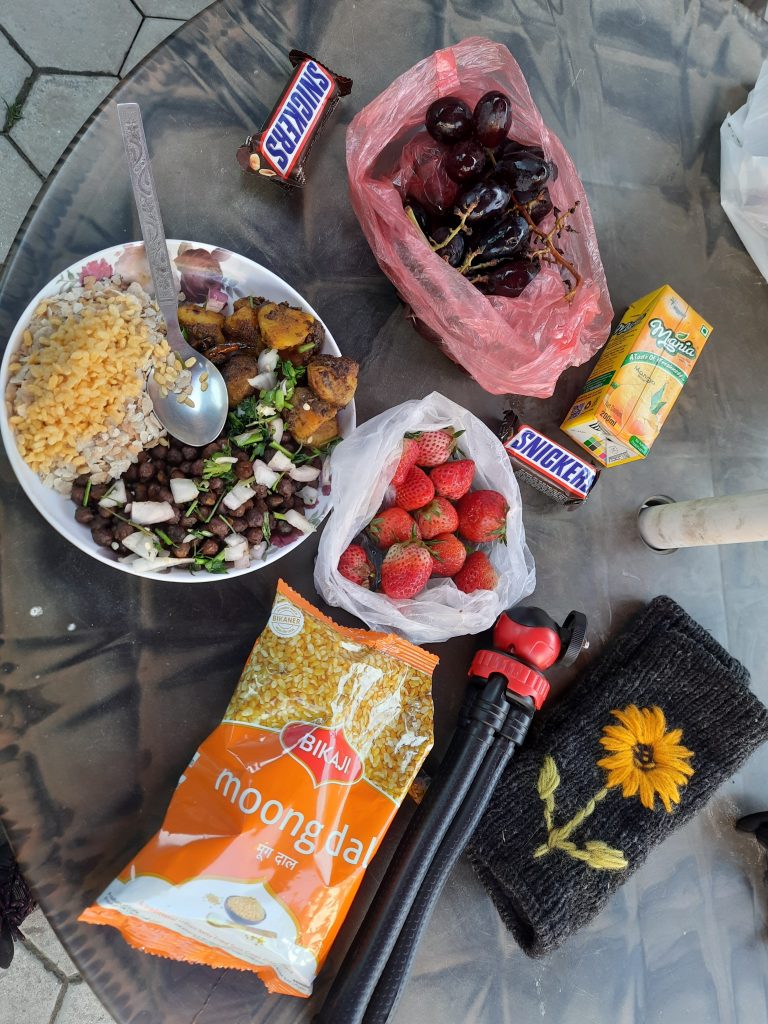
I had carried power bank, it helped me keep my phone charged throughout my trip and save some money! I had carried a lot of foods like noodles, biscuits, bhatmas, coconut, almonds, chocolate bars, saatu, apples, etc. which helped me skip certain meals as well. You see, the budget can be varying depending upon how much you wish to spend. Moreover, as I’m a vegetarian I skipped meat in entire trip making my cost very less.
A Friend in Forest Camp – Mardi Guest House
Most Important Things: -If you are returning from High Camp through Sidhing, make sure you start as early as possible, not later than 12:00 pm. Else, you might find it difficult to walk in dark through the forest. -Carry torch & power bank. -You will not get any Jeep or local bus services after 4:00 pm in the evening which is a new rule.
The route was somehow dirtied by the trekkers. There were a lot of plastics and non-decomposes on the way to Base Camp. If you are planning to explore this place, please take your wastes back with you or do not carry such wastes! Be a good citizen.
TEAM: Kishor Karki, Bishnuhari Bhattarai, Prashun Khadka, Aleena Rayamajhi – A complete team of Engineers. Four Days & Three Night Trip!
Final Destination – Gosaikunda, 4380 m
The Langtang Trail is one of the most popular, nearest and longest trek route from Kathmandu, Nepal. The popularity of the Langtang Trail is because of the amazing view of the Gosaikunda that is located in 4380m altitude. Not just the view, but also the temple that is located near the lake which is believed to be a holy temple of Shiva has also made it a popular trekking spot. The lake holds a great mythological history of ancient Hinduism.
I had been to the Gosaikunda last week (5th April, 2019). I’ll be giving you some of the advice and ideas about the trail if you are also willing to enjoy the same trail!
I’ll be explaining the entire summary of just about route at the end. If you are in hurry, you can switch to the last section. But, if you are not, enjoy my four days wild trekking experience!
I had been to Kathmandu on 1st of April to attend a meeting of my office. On the next day two of my colleagues including myself were having momo for lunch while we came up with the idea of trekking to Gosaikunda.
As our second meeting-that was supposed to be on 4th of April-was cancelled, we thought of utilizing the time by making it a memorable trip!
The two of my colleagues also called one of their friends to join us and thus, we were four now. I was the only woman there, but that’s fine.
I had just heard little about the trekking trail and had never trekked above 4000m altitude till date! But well, everything has to be for the first time once!
We four started the journey from Kathmandu at 9 am on April 3rd. We had two bikes and three bags.
To be honest, I had just carried some formal clothes and heels, laptop, laptop bag and a pair of sports shoes and two stretching pants to Kathmandu from my hometown because I had no idea that I’ll end up at 4380 m the same week! But fortunately, I could borrow some warm clothes from my sister in Kathmandu!
Okay, so I was telling that we had two bikes and few bags. Mine was a laptop bag instead of a trekking bag which I feel shy to explain right now! I had carried a bunch of snickers to feed on while trekking, and a packet of sanitary pads, as I was expecting period the same week!
It took us 8 hours to reach Dhunche from Kathmandu from bike. I’ve heard buses leave to Dhunche from Machhapokhari every hour and will take you to there within 7 to 8 hours of drive. Dhunche, being the headquarter of Rasuwa district was quite developed and there were plenty of good lodges to stay at. We stayed at Namaste Gosaikunda Hotel that day. The cost was NRs. 1000 per room.
Because the terrain being Hilly, it was a rough ride. I had to take a hot shower because I was covered with dust! After having a heavy dinner, we rested that day early and started the trek the next day (April 4) at 7 am. We had a light break fast, which we regretted instantly as the first hour of trek made us hungry again! We left some of our extra clothes in the same lodge along with the bikes.
Ghatte Khola
After walking for 3 hours through beautiful view of rural houses, Ghatte Khola, dense jungle, you will reach Deurali which is at 2500 m from sea level. You will find a small hotel that will serve you with snacks and even a place to stay. But we didn’t stay longer there.
Deurali – In frame: Me, Bishnuhari Sir & Prashun Sir
From Deurali, it took us 2 hours to reach Dhimsa where we could have our lunch. The food was average. You cannot grow anything except potatoes there. Because the owner of the hotel was not there, only a little girl, who was the sister of the owner, cooked us the lunch. My trek partners helped her with the cooking while I was so tired that I felt asleep in the bench outside the hotel.
Dhimsa: waiting for lunch
I cannot believe how I could eat that amount of food that time. The magic was in hunger and not in food probably! Thanks to the little girl’s effort, the energy was regained. The four plates of vegetarian lunch, few packet of chow-chow, biscuits, a bottle of coke and a liter of Chhyang (local alcohol made from Maize) costed us around NRs. 1500. It sounds fair enough at such a place where no transportation can reach.
Then, from Dhimsa the trek continued from 3:00 PM. After walking for an hour through the jungle we reached Chandanbari (Singompa) where one can find plenty of good hotels and good view of the mountains. But we didn’t even stay for a minute there but rather enjoyed the slow walking through the roads with the beautiful view of the mountains and passing across the Cheese factory which we thought of giving a visit while returning. (But unfortunately while returning the factory was closed.)
From Chandanbari, trekking for around two hours will take you to Cholangpati, which is situated at 3500 m altitude. To reach there you will have to cross the roads covered with snow. It was a rough time. But well, the trekking made us sweaty and the snow could not make us cold. I was feeling so hot that I was still drinking the remains of coke that we had bought at Dhimsa at double the original price.
Anytime companion, either sun or snow
Once we reached Cholangpati, it was already 5:00 PM and the weather fluctuated so badly that it became windy with cold breeze outside the hotel. We were served with a tea made from Dhuppi. It was supposed to increase a year span to the life of the one who drinks it. We also seated around a firewood stove that was built for the same purpose.
Dhuppi Tea: assumed to increase life span by one year
I don’t know how magical the tea was and if it really increased our life span by one year or not, but it was magical enough to change the weather back to sunny. After completing the tea we could see that the angry wind was gone. This motivated us to make our last trek of 2 hours of the day!
After trekking for about an hour, it was already dark now! The rough terrain was already troubling us. Our phones were about to die of having no charge. Meanwhile, we met a group of people who were heading towards the same place carrying a lot of stuffs. We were fortunate enough to know they owned a lodge and were willing to guide us till there.
I cannot explain how painful it already had been, because we were again walking in snow, and this time in dark! Two colleagues of my team were already tired and unable to walk. Thanks to my stamina, I didn’t get any altitude sickness! So finally at 7:00 PM we reached Lauribina, 3900m altitude!
Lauribina is a Nepali word that means without-stick. As per the name suggests, you are supposed to walk this trail without a stick if you are trying to please the gods in Gosaikunda. But, I was not going to meet or please the gods but rather for the view, so it didn’t matter me. We had already bought sticks from a little boy at Dhunche, without which I might have fallen down because of the slippery snow! It costed NRs. 25 for one good stick, or lauri (in Nepali).
There we met some foreign trekkers, two from Germany and one from France. They were quite friendly! The lodge was ‘The Morning View’ which served us well. We had our dinner, hot water, and sat for a while around the firewood stove to heat our snow feet.
I was exhausted and slept immediately once I reached my bed. I was having ache in my body the entire day! Specially my joints, knee caps, legs, shoulders and chest were having some serious pain. After having a good yet cold sleep, we woke up at 6:00 AM!
Guess who was there? My period. So now all the pain a day before I faced made sense to me! The period cramps were on my way and I was getting mood swings from a day before. Anyways, freshen up, left the bags there, had a good meal, and left for the final destination, Gosaikunda at 7:45 AM. The roti-tarkari costed us NRs. 200 per plate. A stay at Lauribina costed us NRs. 1100 per person along with dinner and breakfast with the same money.
Breakfast at Lauribina along with garlic soup A view from Lauribina!
This has to be the most difficult trek for me. I was already tired from walking the entire day a day ago, and it was my first day of period too. Well, the challenging part was, I had only male companions along with me, therefore, I didn’t feel like sharing my ache. I feel pity for them as I might have expressed my anger due to my mood swings!
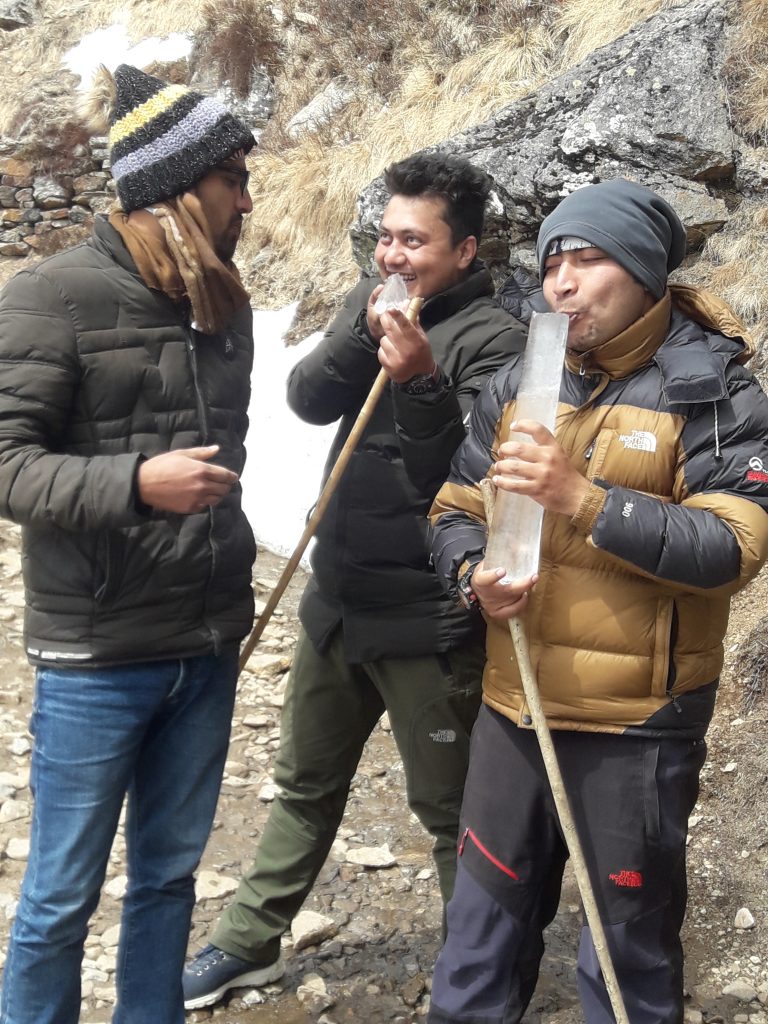
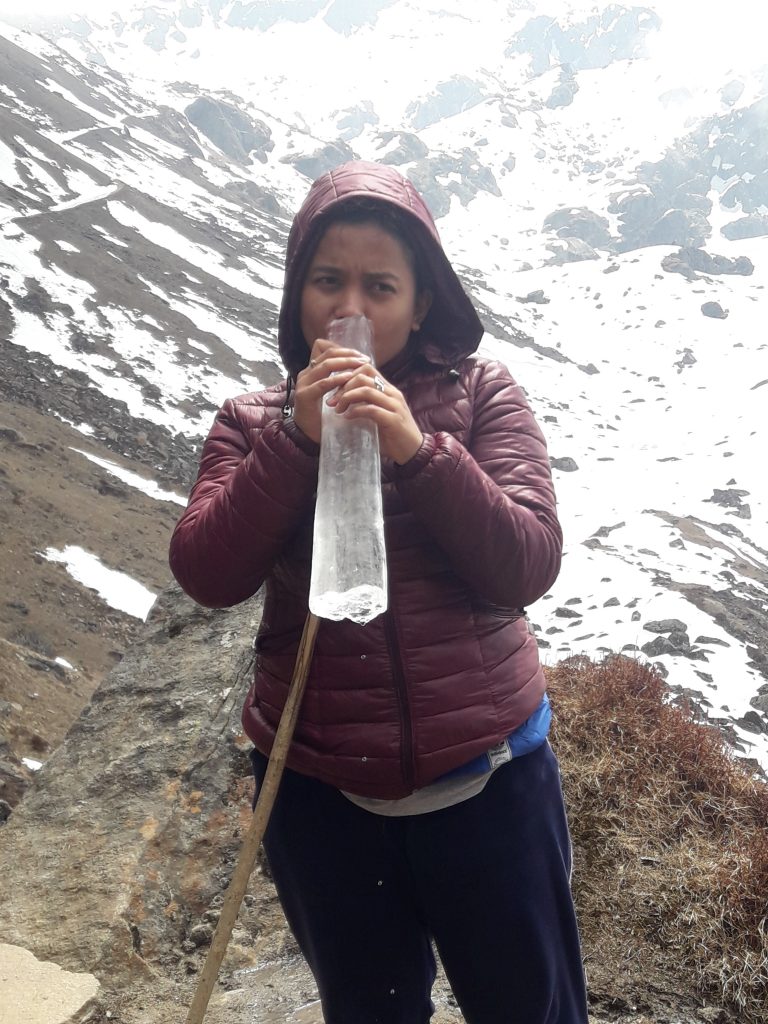
We forgot to carry water along with us as we left all our bags there. Thus, we had to suck the ice to feed the enough water.
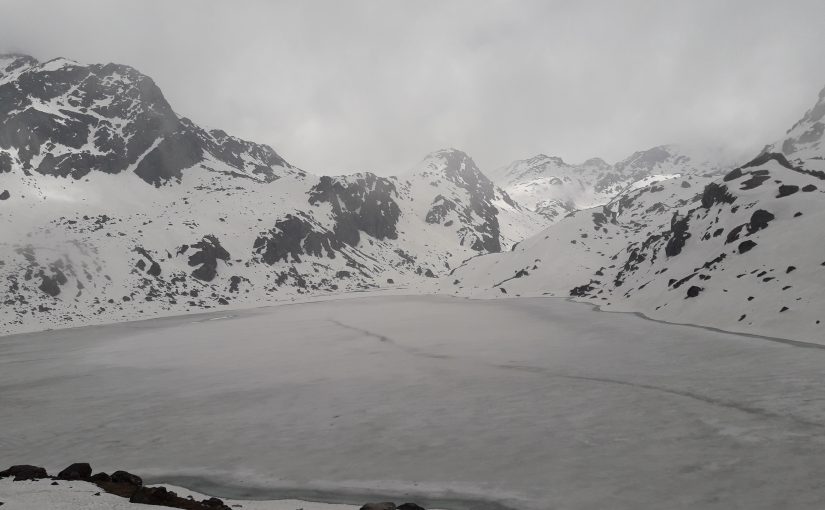
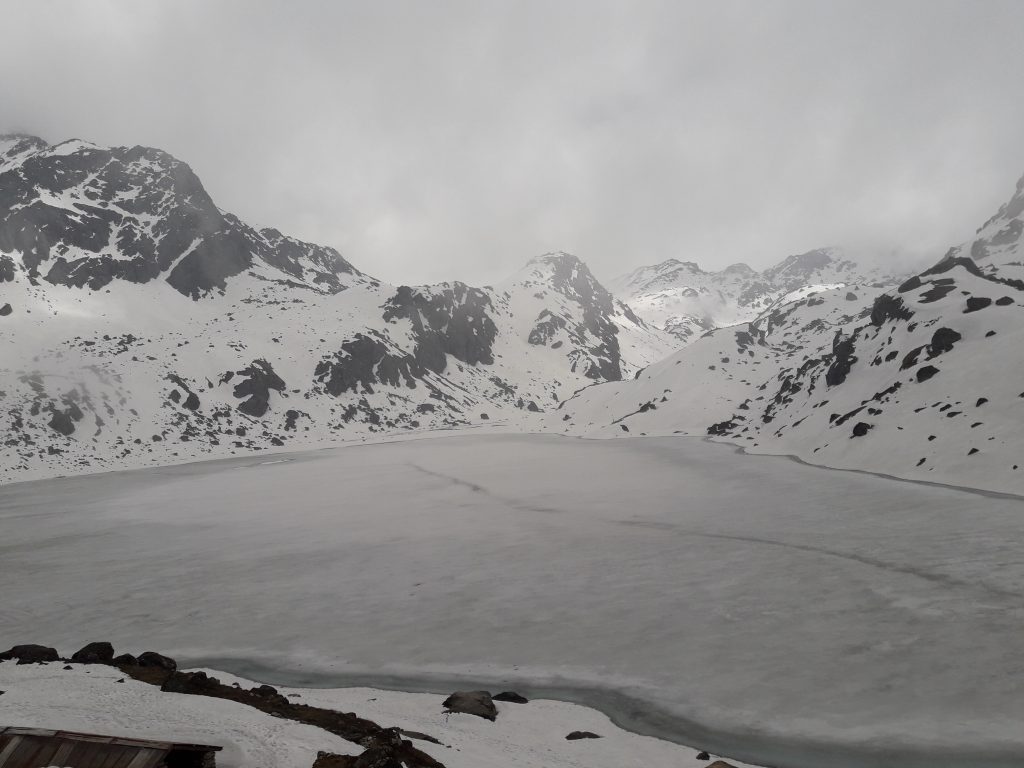
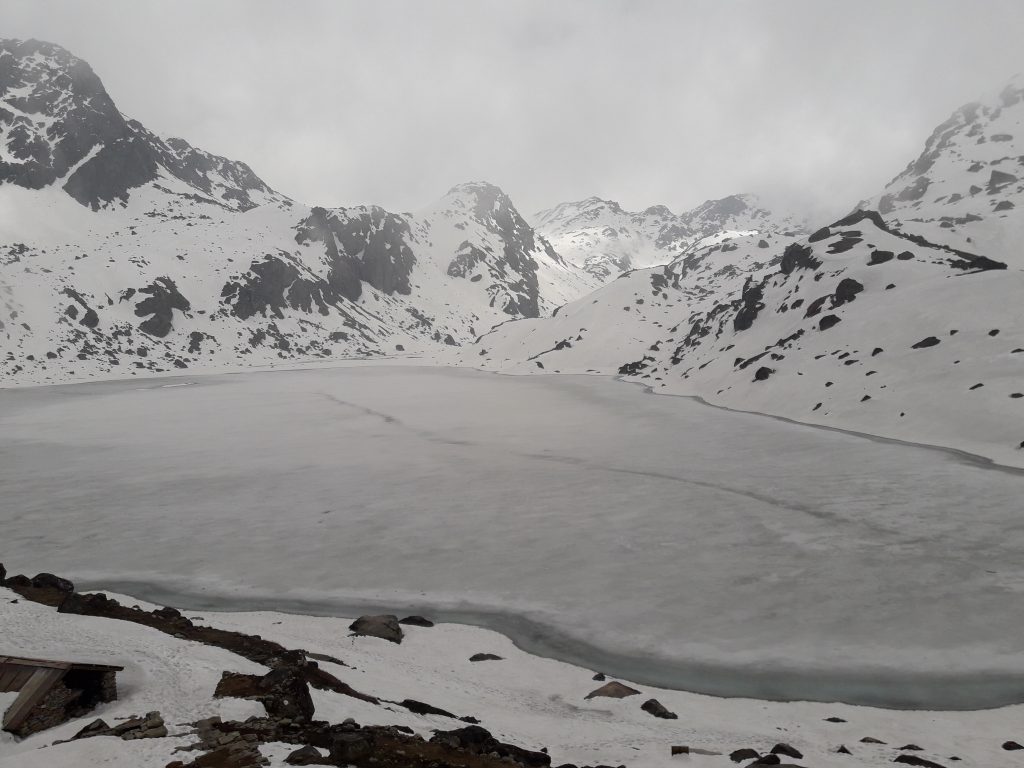
It took us three hours to reach the beautiful Gosaikunda which was our final destination. We were at 4380m altitude already! On our way we could also see some other Kundas (small ice covered pond). Gosaikunda is also one of the 108 ponds that exist there. There is also a temple which was unfortunately closed. Gosaikunda was covered with ice. The view was worth the two days of trek!
Gosaikunda 4380 m Gosaikunda, 4380 m
Gosaikunda being the holiest lake of Nepal, has an amazing mythological story! Lord Shiva is believed to have released the entire poisons by resting in the same lake. Gosaikunda is the starting point of Trisuli River as well.
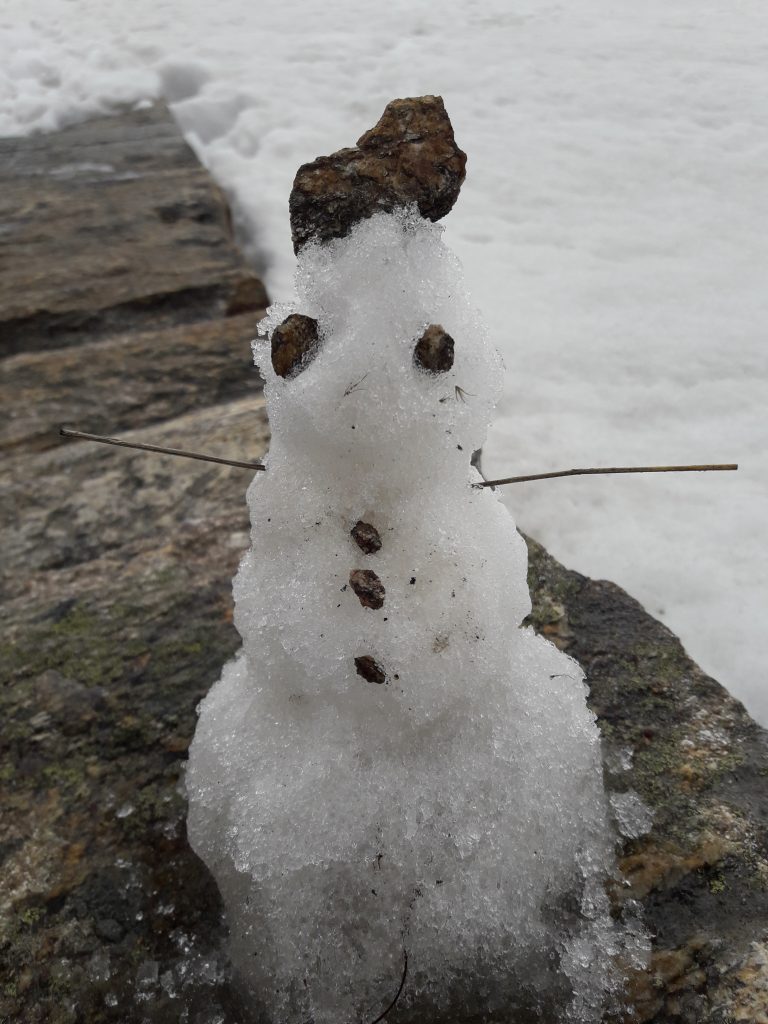
After having a bowl of garlic soup, which costed NRs. 250 per bowl, we played in the snow. I made a little snowman too. It was funny how our legs were going deep into the 4 to 5 feet of snow there. We took a lot of pictures, enjoyed an hour resting in the snow, and returned from there.
From Gosaikunda it took us one and half hours to reach back to Lauribina, where we had Rara soup, NRs. 200 per bowl and trekked back after collecting our bags. It is always easier to trek downhills and to the roads where you have already trekked once!
We stayed that night in Dhimsa, where we could again eat the dinner, the same daal bhaat and tarkari that gave us plenty of energy a day before to climb till Lauribina. A dog followed us from Chongpati to Dhimsa where I rewarded it with some portion of my daal bhaat tarkari. We reached Dhimsa at 6:00 PM
Bye bye Dhimsa!
It rained in the morning the next day, thus, we began our trek only at 8:00 AM and reached Dhunche at 11:30 AM where we had our lunch and returned back to Kathmandu!
SUMMARY OF THE TRAIL! Kathmandu to Dhunche: 6 to 7 hours in bike or local bus. Starting the trip at 9:00 AM. A night rest at Dhunche Dhunche to Deurali: 3 hours climb though hilly terrain, Ghatte Khola. Availability of local hotel for lunch and stay. Should start the trek at 7:00 AM with heavy breakfast. Deurali to Dhimsa: 2 hours of trek through rough road. Lunch time. Dhimsa to Chandanbari: 1 hour trek through jungle. Chandanbari to Cholangpati (3500m): 2 hours of trek through snow covered roads. Cholangpati to Lauribina(3900m): 2 hours of trek through snow covered roads in some portion. A night rest at Lauribina. Lauribina to Gosaikunda(4380m): 3 hours of trek. Begin the journey at 7:45 AM after having heavy breakfast.
ESSENTIAL REQUIREMENTS! 1. Gear and shoes with good grip 2. Plastic above your socks to avoid snow water wetting the socks and feet 3. A lot of chocolates to constantly supply energy 4. A lot of water to keep yourself hydrated 5. Medicines for headache, body pain, stomachache 6. Warm clothes, woolen cap, and gloves 7. Plastic or raincoat to avoid snowfall wetting your body 8. Music gadget, to make your trek musical 9. Power bank, to supply your phone with charge 10. Stretching pants, avoid jeans! Carry extra socks too 11. Moisturizer & sunscreen 12. Torchlight & Stick
The entire journey will cost you NRs. 6000 per person if you follow the same expense. Because the journey will lead you to a holy place, you will also avoid meat and alcohol most probably, so this amount will do!
I hope this article will guide you to Gosaikunda! Don’t worry, there is hardly an Internet service, your phone will be out of reach of network, thus, you will enjoy the nature and not the phone for four days. It will be awesome if you wish to stay for more than four days, but even four days will do!
The beauty of Gosaikunda and the difficult path that leads you to there is worth your four days time. It is better with friends or colleagues like mine!
Because you are going out in the mountains, so forget where you came from. For four days, forget your office or college. Dedicate the entire time to nature, who knows if it becomes the best trek of your life! Happy trekking the Langtang Trail!